How to use Blu-ray Creator

Support Updated on Apr 15, 2022 4:52 PM
Blu-ray Creator is a easy-to-use utility that lets you easily burn video to Blu-ray disc (BD-25, BD-50), create DVD disc (DVD-5, DVD-9), and output ISO File for further uses. All video formats including AVI, MKV, MOV, MP4, WMV, FLV, etc. can used for video to Blu-ray and DVD conversion. Meanwhile, burning ISO file to Blu-ray/DVD disc is a piece of cake. What's more, this Blu-ray burner software supports to burn 3D Blu-ray/DVD movies, edit videos to get customized Blu-ray/DVD content, create photo slideshows and burn photo slideshows to Blu-ray/DVD. In order to let you enjoy Blu-ray or DVD disc to the fullest, this Blu-ray maker is with abundant menu templates. You can directly apply the built-in menu to output or further design menu with your favorite elements.
Step 1: Load Media Files
Click on the "Add Video" or "Add Photo" icon on the upper left side to browse videos or images on your computer and then load those you want to burn to Blu-ray or DVD disc into the software. Or you only import files via direct drag-and-drop. This Blu-ray burner allows you to add external subtitles to video and you can also make a selection on audio channel. The loaded files could be displayed in thumbnails or details. After loading, you could select display method; play back loaded files, select subtitles and audio tracks, etc.

Step 2: Set disc menu
Choose a disc menu on the right side of this Blu-ray Creator (see screenshot above) for output Blu-ray movies. You could select from preset models or custom disc menu as you like. You could preview selected disc menu, DIY disc menu and then click "Save Template" option to save custom disc menu into "Custom" group. Click "No Menu" option on the disc menu selecting panel if you need no disc menu.

Step 3: Necessary setting for Blu-ray/DVD creation
Choose to burn to DVD-5/DVD-9/BD-25/BD-50, and set aspect ratio as 4:3 or 16:9 (when burning to Blu-ray, only 16:9 is available) on the bottom of the main screen, and select quality in "Fit to disc" at the bottom of the main program interface. Space needed for Blu-ray or DVD burning can be accessed.

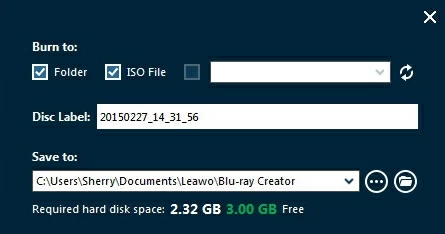
Click the big green "Burn" button on the top right corner to invoke more burning settings, including Burn to, Disc Label, Save to, etc.

Step 4: Burn video to Blu-ray or DVD
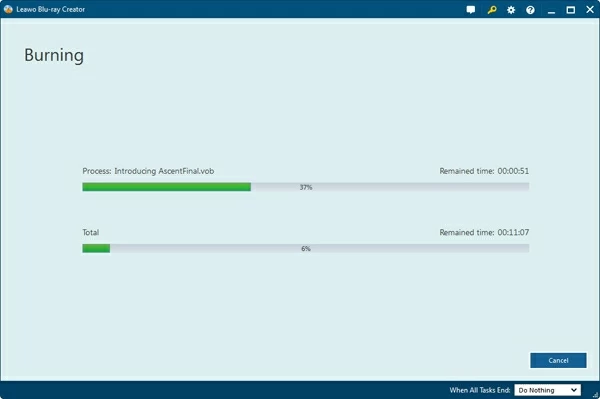
Click the "Burn" button at the bottom of the burning settings panel to start video to Blu-ray/DVD burning. This Blu-ray Creator would then carry out the burning processes one by one. On the Burning interface, you could view the burning progress and do after-done settings.

Edit Blu-ray/DVD Video (optional)
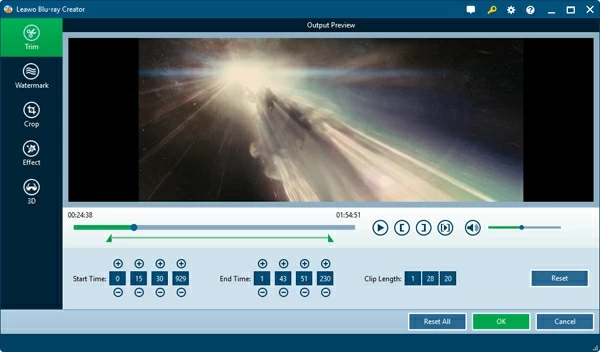
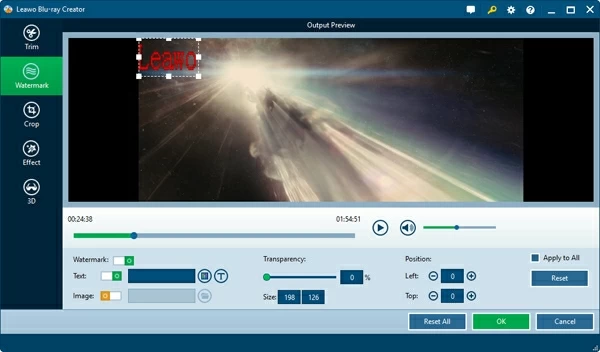
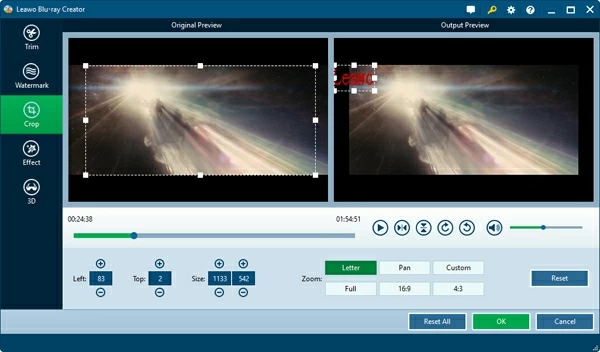
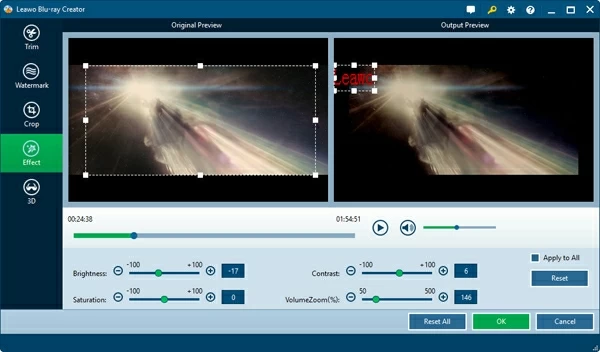
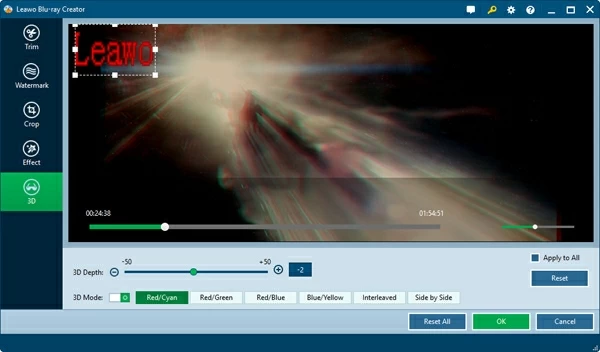
Select a loaded video file, click on the "Edit" icon in the source video title to enter the video editing and 3D movie creating window. You'll find all of the editing features activated on the left side.

Trim: Under the "Trim" tab, you can trim video to milliseconds. Drag the slider to cut video length or set values in Start Time and End Time boxes. You will see the total Clip Length.

Watermark: Under the "Watermark" tab, you could add logo or banner to your video. Switch "Watermark" option to green and then you could add either image or text watermark. Video transparency, left margin, top margin and image size can be set.

Crop: In "Crop" tab, you are able to remove the unwanted part of the video. Move the dot frame on the video to get the required part, or input specific values to Left, Top, and Cropped Size.

Effect: Under "Effect" tab, you can adjust video effect. Move the sliders to adjust video brightness, contrast, saturation and Volume Zoom.

2D to 3D Converter
Open the "3D" tab, by moving "3D Effect" option to green, you could burn 2D videos to 3D Blu-ray/DVD movies with 6 different 3D effects available: Red/Cyan, Red/Green, Red/Blue, Blue/Yellow, Interleaved. The 3D Depth could also be adjusted. You could get instant preview of selected 3D effect.

Design Blu-ray/DVD Menu
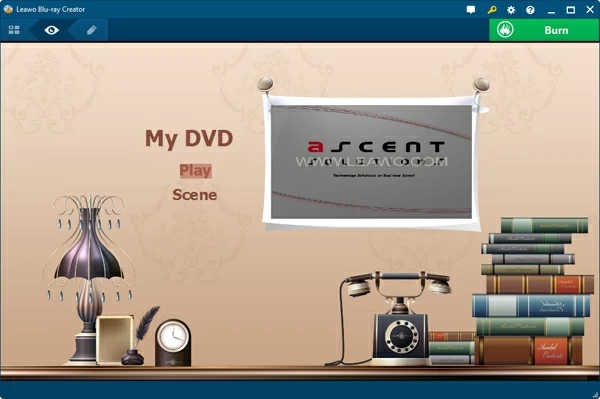
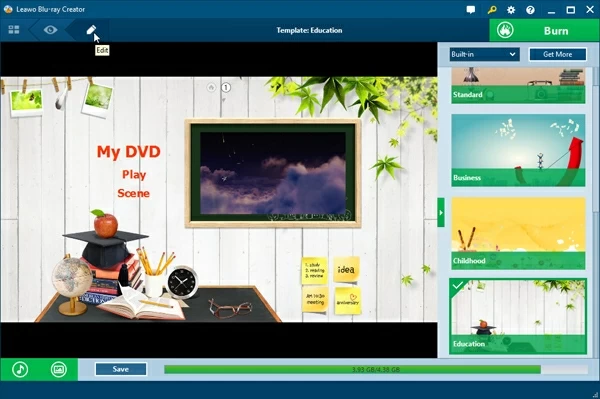
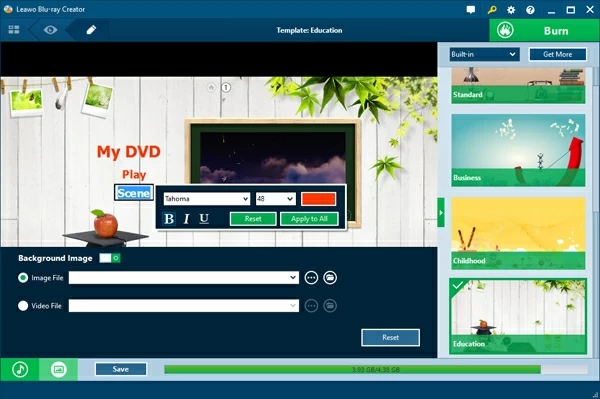
After loading source videos into this Blu-ray Creator, you can see the Blu-ray/DVD menu on the right side bar. Mainly, it is categorized into 3 types: Built-in, Online and Custom. In the Built-in section, there are many different themes preset for you: Standard, Business, Childhood, Education, Holiday, Nature, Sports and Wedding. If these templates can not fulfill your requirement, you can also download them online. By clicking the middle of each theme, you could get preview of selected disc menu. On the disc menu preview interface, click the "Edit" icon on the sub-menu bar to enter the disc menu editing panel.
On the disc menu template editing panel, you could rename titles, adjust the title font and color, adjust title position, load background image or video, add background music, edit the content on chapter list pages, etc.

After editing, you could click the blue "Save Template" button to save edited disc menu template into Custom group. Then, move mouse to the big green "Burn" button to continue the video to Blu-ray/DVD burning progress.


