How Do I Get My Photos on iPhone 7 Back
It would be great if you can get music off your iPad and copy it into MacBook, right? Well, now you can go with iTransfer, an awesome iOS management application, that allows just that.
Whether you plan on getting rid of the iPad you've already used for years or just free some space from the device, you can use the third-party applications to easily transfer all the songs and other media files from iPad to MacBook hard drive.
This sounds simple, but it's actually been difficult in the past. iTunes, the Apple's media management application to handle iOS device synchronization, has its limitations. While it allows you to sync media files (music, videos, photos, audiobooks, films, ringtones) on your computer with iPad (Air, Mini, Pro), it lacks the support of transferring files, including music, from iPad back to your MacBook (Air, Pro, and Retina Display model).
The 3rd Party Music Transfer application
Fortunately for you, with a right 3rd party program you can copy all of songs on iPad to MacBook in just a few minutes. In this post, I'm happy to recommend the powerful—and easy to use — iPhone Data Transfer to do the job. It delivers on its promises, making music transfer easy and quick, with no compromises.
This software enables you to transfer music individually or in bulk, as well as copying other media files such as movies, TV shows, podcasts, audiobooks, playlists, home video and photos back to your MacBook. It's cross platform and works with all kinds of iPad, iPhone. In addition, it can transfer files from computer to your device, making it an excellent iTunes replacement if you're not a fan of iTunes.
iPad Music to MacBook Transfer
Step 1: Plug your iPad into Macbook
Launch the iTransfer by double-clicking on it and then plug your iPad (Air, Mini, Pro) into your MacBook using the supplied USB cable.
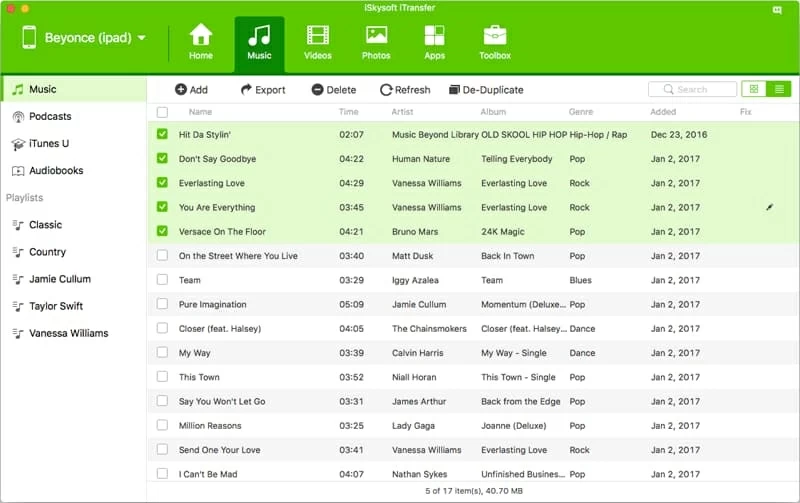
You should now see this screen.

Step 2: Choose the Music option on the navigation bar
Click the Music button on the navigation bar, iTransfer will now display all tunes on your iPad. All those tunes are sorted by categories including Music, Podcast, iTunes U, Audiobooks.
To transfer songs from iPad back to MacBook, all you have to do is click the Music category on the sidebar, then you highlight the tracks you want to transfer from the right pane. To select all of the songs, tick the box next to Name label.

Step 3: Start exporting your music files from iPad to your MacBook
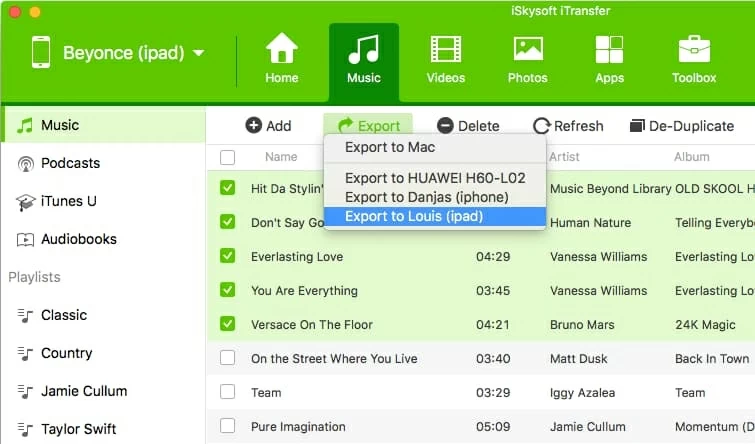
After selection, click the Export button from the toolbar under the navigation menu and then choose Export to Mac option.
A dialog will pop up and ask you to select a location on your MacBook hard drive. You just specify where you want to save the exported iPad tracks. Finally, simply press the Save button in the dialog and the transfer of your iPad music to MacBook will start.

Wait while iTransfer export your music and store to the location you chose.
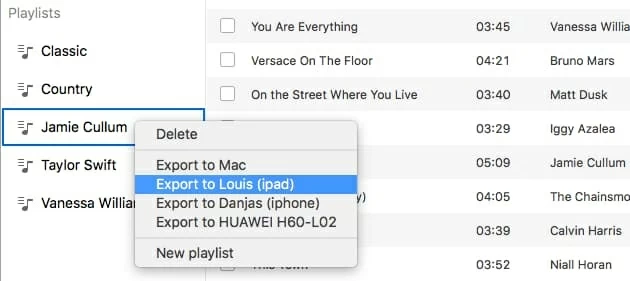
Tip: If you only want to move the songs of a playlist to your MacBook, you can head to the left sidebar of the window and find that playlist to move your songs.

Please keep in mind that backing up music from an iPad to a MacBook does not mean that the songs are erased from your iPad library. You're just performing a copy. To free up the storage space on the device, you will have to manually delete the songs you don't want to keep using the Delete option in the toolbar of this program's window.
Supported models: iPad 2, iPad 3, iPad 4, iPad Air, iPad Air 2, iPad (2017), iPad Mini 1, iPad Mini 2, iPad Mini 3, iPad Mini 4, iPad Pro, etc.
How to Put All Songs from iPhone onto Laptop