How to Record Zoom Meetings on Mac
How to record a Zoom presentation for academic purposes? In fact, you don't need to worry. We will share two simple and worthwhile methods for you to try in this guide.
Today, many of us are used to working or studying from home, and are increasingly using Zoom for online meetings, interviews, and webinars. Sometimes you might want to use Zoom to record a presentation video so that you can review some important points afterwards and send it to your workmates. So, how to record a Zoom presentation?
If you want to find ways to record a Zoom presentation with the PowerPoint Slidedeck, you should follow our step-by-step instructions. Everything you want to know is here.

Feel free to get to the simple ways to record a presentation video using Zoom.
Table of Contents
Zoom is an effective tool not only for online meetings, but it can also be used in presentation recording and remote screen sharing with high-definition video and audio. You can start or join a meeting with one click on a computer, phone or tablet and record a presentation in Zoom easily.
Zoom supports both local recording and cloud recording services. By default, cloud recording service is not included when using Zoom Meeting of free edition. If it is required, you need to purchase additional recording service. Besides, it only allows hosts and co-hosts to record.
Given this, if you are to record a Zoom presentation, you can follow the steps.
1. Open the Zoom app and your PowerPoint slides. You'd better close all other websites and tabs in case you click on an unrelated page unheedingly when you are recording a presentation.
2. In Zoom, firstly go to Settings > Recording, make sure that you toggle on Local recording. Then, navigate to the home page and click on the orange New Meeting button.

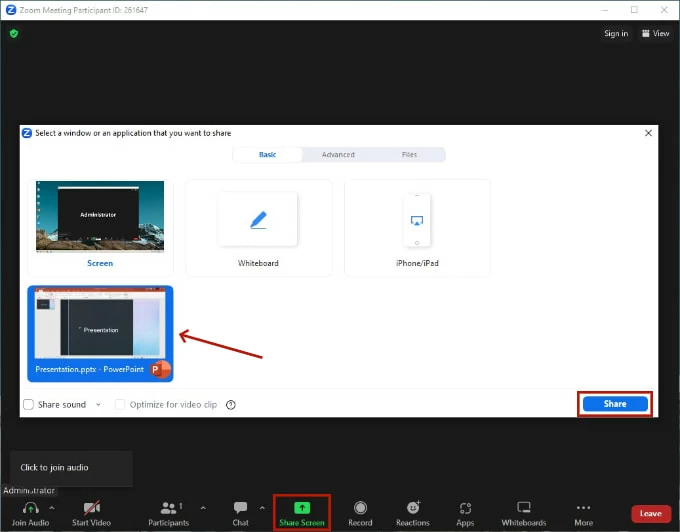
3. After entering to the meeting, hit Share Screen in the bottom menu. From the pop-up window, you can select the content you would like to use and click Share to confirm.

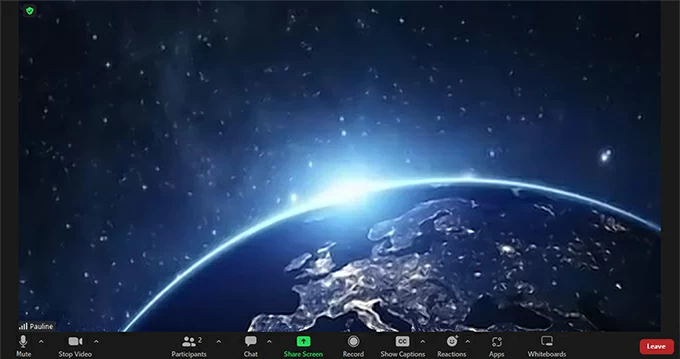
4. It's time to record! When you going to start your presentation, ensure the microphone is set up and hit on Start Recording from the menu bar.

Note:
5. Once you finish, select the Stop Recording button and click End > End Meeting for All to quit.

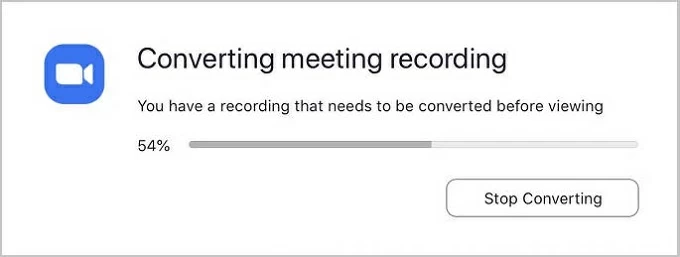
6. As long as you end the meeting, a popping window will show you the process of converting your Zoom presentation recording.

7. When the conversion is completed, you can locate the Zoom folder on your computer to check the file. If you keep the record in the cloud, you'll soon receive an email containing the latest recording.
Tip: If you want to use shortcut keys to record a Zoom presentation on a Mac, remember to click the PowerPoint or Zoom first to focus on the page.
As mentioned above, Zoom only allows the host to start, end or record the meeting. But what if a participant wants to record a video? Follow the steps and you can allow others to record a Zoom presentation.
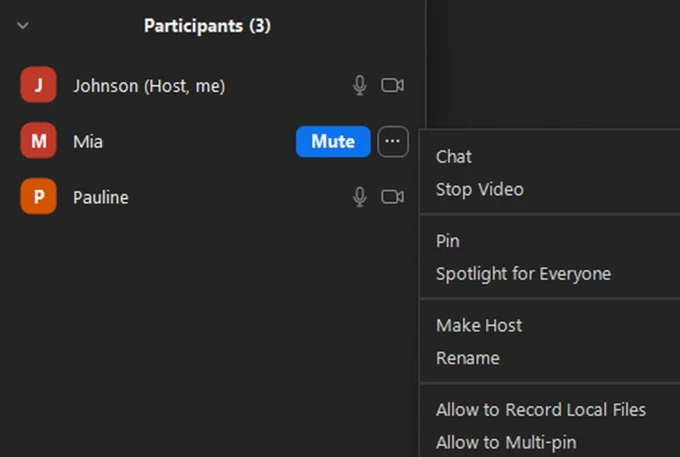
In Zoom, click Participants and the list is displayed. Hover your mouse over the attendee and click More to view the options. From the dropdown menu, click Allow to Record Local Files.

Typically, if you are a participant of the Zoom meeting, you need to request recording permission from the host before the presentation starts. But somehow, you may not have permission. In this case, if you insist on recording a Zoom presentation, you can turn to a third-party screen-recording software. Here comes AppGeeker Screen Recorder.
Screen Recorder is one of the best Zoom video recording software for Windows and Mac. With this tool, you can record a high-quality Zoom presentation video with full voice from you and all members, even if you don't have permission to record in Zoom. When the recording is over, you can convert the video to multiple formats and edit it in the app.
Here's how to record a presentation in Zoom using Screen Recorder.
1. Download and launch Screen Recorder. Enter a Zoom meeting and open the PowerPoint file.

2. Hit on Video Recorder. Once there, you will see four sections that you can customize before recording. To record a Zoom presentation, usually you should turn on your system sound and microphone, set up your webcam, and then select the recording area.

3. With all settings completed, you can start recording Zoom by clicking the REC button.
4. When the presentation is ended, simply click the red Stop Recording button. Before saving Zoom videos locally, you can use the clip feature to cut unwanted parts from the recording.
![]()
By default, only the moderator can record Zoom meetings on Mac/Windows. If you want to record a presentation video as an attendee in Zoom, you may need to get permission first, otherwise you'll need to record the Zoom meeting in other methods, like Screen Recorder.
Unfortunately, if you are sharing screen of the slides in Zoom, you are not able to simultaneously record your webcam since the slides will take up the entire screen. It's more advisable for you to use a third-party tool to record a presentation video with camera in Zoom.