How Do I Transfer Files from Android to Android
"I mistakenly deleted my phone logs on my Galaxy S22 phone as I was ready to text from call log entry. I was attempting to reach the texting panel but tap the deleted button instead. How do I recover the call logs?".
Call logs are rarely mentioned when we are trying to recover data files on Android device, but they are as important as other data and can help you check who called you and whom you called, associated with dates, meetings and other activities. So when the call history gets lost from your Samsung Galaxy S22 phone, you may want to find them back.
The worst thing is that few people would bother or forget to back up their phone records every time they make a call. You never know the importance of the phone logs until it is too late. This is where Android Data Recovery comes in when you are stuck at this situation.
With it, you can choose any sorts of data to be scanned and restored on Samsung Galaxy S22: contacts, photos, call history, messages, audios, videos, documents, etc). You can preview the scanned data files and target your recovery to a particular file type or retrieve everything that is flushed out from the device and get the recovery results exported to the computer.
Warning: To get back as many call logs as possible on your Galaxy S22 (SM-S901U, SM-S901W, etc), please restrict the use of the device, since any activities will replace the old phone records.
Get Started
Step 1: Run the program
Once you get the program installed on the computer, fire it up and choose "Android Data Recovery" mode on the main interface. After that, connect your Samsung Galaxy S22 phone to the computer via USB cable.

Step 2: Turn on USB debugging mode
To detect Galaxy S22 phone successfully, you need to allow USB Debugging mode on the device. Please go to the device's setting and get it done by following the on-screen instructions as below. If you fail, please refer to how to enable USB Debugging mode on Android.

Step 3: tick off call logs to be scanned
In the following screen, choose the file types you want to reclaim from Galaxy S22 phone. In your case, select "Call Logs" category and press Next button to continue.

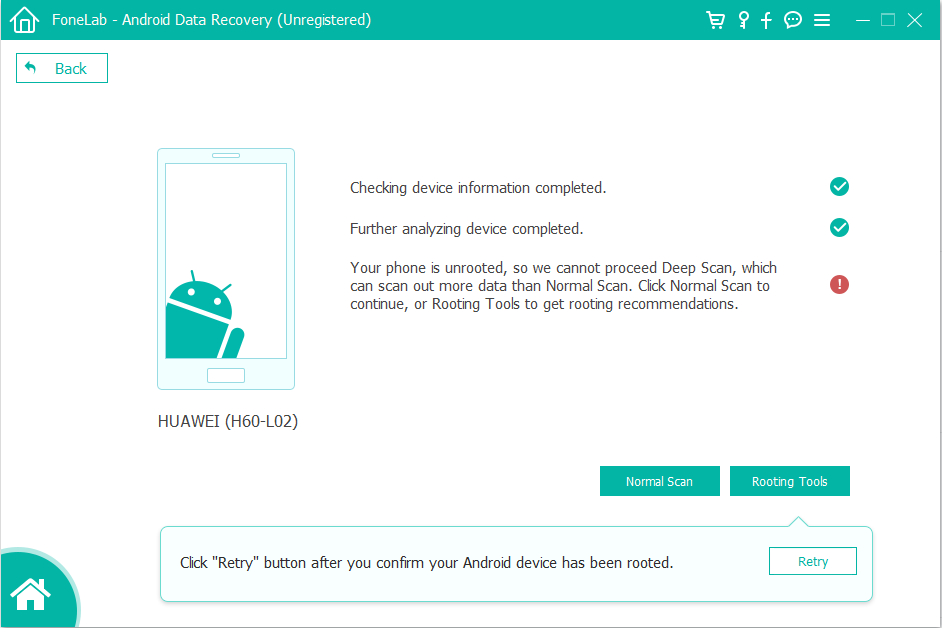
To initiate a deep scan, a root of your Samsung Galaxy S22 phone is required. To do so, click on the Rooting Tools button to install a tool called KingoRoot on the computer to root your handset.
You can also check out our detailed article about how to safely root and unroot an Android device.

Once rooted, it will start scanning your Galaxy S22 phone completely for lost call logs.
Step 4: Start the call history recovery process
After 15-20 minutes of rooting and scanning, you will come to a screen which lists the extracted files on the left pane. Click the "Call Logs" category and select the call records you want to retrieve by ticking off the checkboxes.

When you're ready, simply hit the Recover button at the lower right corner. In the opening dialog box, choose a path for the restored call history of Samsung Galaxy S22 phone.

After that, hit the Recover button again to initiate the recovery process. Your call history will be save in HTML format in the folder.
That's it!
View the Call History Online
If the deleted call logs have been overwritten and can't be regained from Samsung Galaxy S22 phone, then you can access the call records online, which requires a user ID and password for login. For example, you can sign into your network provider (i.e. AT&T) account and view the recent 1000 phone records, including inbound and outbound calls. By default, the calls are sorted by date and time, as well as call type. You can use one of these filters to search for what you need.