How to record videos on Windows 11 laptops screen
In search of a simple guide that explains how to fix Audacity won't record computer issues? Here in this post, we have a detailed guide to help you resolve that.

With the updates of the hardware and software of Apple, Audacity can't be used on those silicon-based Macs.
Audacity is no doubt one of the industry-leading open-source programs that let you capture audio recordings without operating system limitations. Also, it is loaded with powerful editing features that you can use to manipulate your recordings. It's nicely designed with a streamlined interface that lets novices navigate with ease.
This tool is famous for the quality services it offers. However, there are complaints about Audacity not recording sound from the computer. The reason for this issue isn't fixed, while it could be a result of an outdated software version or computer system errors.
Regardless of the cause, we believe it's fixable. To do that, check out the detailed tutorial in this article to resolve Audacity won't record from the computer.
Table of Contents
Audacity is committed to capturing quality audio recordings without hassles. But sometimes, you may experience some challenges like Audacity won't record from the computer. There is a plethora of reasons why the tool won't capture recordings on your computer. Sold it then are listed in the below:
If you haven't activated Stereo Mix, you may find that Audacity can't record audio from the computer. Then before recording audio on your Windows PC using Audacity, make sure you've enabled Stereo Mix:
1. Open the advanced audio settings window
Head to the bottom left corner of your screen and tap on the Start menu. The response page will automatically pop up on your screen. Select Settings > System > Audio, then click More Audio Settings on the right of the screen on Windows10. If you updated your computer to Windows 11, then scroll down to find the option and click it to open the audio settings.

2: Enable Stereo Mix
In the Recording tab, right-click Stereo Mix. Check Show Disabled Devices and Show Disconnected Devices. Then check Enable.

After finishing setting the audio source, follow the steps below to record audio from the computer via Audacity:
1. Change Audio Host to Windows WASAPI
Launch Audacity. Navigate to the Audio Setup button and select Windows WASAPI from the Host drop-down menu.

2. Choose the recording source
In the same Audio Setup panel, select Recording Device and choose your Recording Device. If there's a speaker on your computer, choose Speaker. If there's no speaker, choose Stereo mix. If you connect the headphone to the computer, then choose Headphones.
3. Start recording
Later, click on the red button to record the computer's internal voice. You can see the wave on the screen showing the real-time audio playing on the Windows pc.

4. Stop recording and export the file
Once done, hit the stop button to stop recording. Alternatively, you can press the space key on your keyboard to stop recording. Click the playing button to preview the recorded audio. If you are satisfied with the audio, go to File > Export > Export as MP3. Or you can export the file to other audio formats like OGG or WAV due to your demands.

Sometimes, Audacity malfunctions due to system glitches. Restarting the program by force-quitting and relaunching it can fix such issues. Alternatively, you can try reinstalling the Audacity program.
The solutions above help you fix Audacity won't record audio from Windows computers. If you use an Intel-based Mac device:

Note:
With the frequent complaint from users about Audacity not recording audio from the computer, you need to source a new tool to record audio. AppGeeker Screen Recorder is one tool you can invest in to capture audio recordings on your computer without issues. It's the best replacement for Audacity if you wish to record sounds with professional results in a simpler way.
The features are flexible. AppGeeker Screen Recorder has no operating system limitations. Whether you wish to record audio directly from your computer system or with the aid of a microphone, you can count on it to capture the sound smoothly. Besides audio recording, Screen Recorder also lets you capture your display screen in multiple dimensions (full and partial screen, or specific window). The software has a sleek interface that enables novices to navigate with complete ease, but it also provides advanced settings for professional users to control the recording effects.
Steps to capture audio on Computer with AppGeeker Screen Recorder
Install Screen Recorder from the official website and run it for operation. When the software opens, follow the instructions below to capture audio on your computer system:
Step 1: Select the Audio Recorder.

Step 2: Turn on System Sound. Then Screen Recorder will capture all system audio and playing sound. If you want to record the external sound at the same time, toggle on the Microphone button as well.

Step 3: Once done with the above, click on the Settings icon and make necessary adjustments to the features on the left sidebar. Then click OK to proceed with recording.

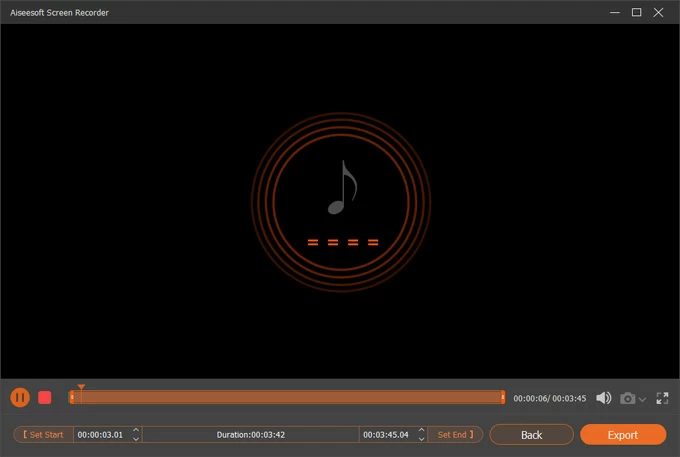
Step 4: Now hit the orange REC button to commence audio recording from the computer. After completing the recording, click on the Stop icon and the recording will be presented automatically on your screen. You can trim the file to set the start and the end. Once done, export the audio file.

Conclusion
With this piece of a troubleshooting guide, you can fix Audacity won't record from the computer without difficulty. We've provided 5 powerful solutions that you can implement when Audacity isn't working properly on your device.
In addition to the troubleshooting solutions, we introduced the best replacement for Audacity- AppGeeker Screen Recorder. This software program enables users to capture video and audio recordings simultaneously. It's a reliable tool that has delivered all it promises. So you can try on it out.