
How Can You Recover Call History on Android Phone


Learn how to recover deleted photos from SD card on Galaxy S22 using Data Recovery software.
Samsung Galaxy S22 was a big step forward for the flashships. From its expansive screen to enhanced camera, Galaxy S33 (SM-S901U, SM-S901W, etc) lets you take your shots the way you want with dual camera.
If you have ever lost photos you've taken on Galaxy S22 or accidentally deleted photos that you still need, you know that it can be very frustrating. Fortunately, there are ways to help you restore those pictures. In this article, we will introduce a few ways in different scenarios.
Way 1: Restore S22 Pictures from Google Photos
If you saved your photos on Samsung S22 to Google Photos—a famous photo sharing and storage service that lets you back up, organize, label your photos and video footage— before they're lost, thing can be easy as you can restore the photos from the backup in no time at all.
Your deleted pictures will be back to photos section it was in on your Samsung S22 phone. Be mindful that Google Photos only keeps images you deleted in the past 60 days.
If you've made backups of your pictures to other cloud services such as Dropbox or OneDrive, retrieving photos back to Samsung S22 is in a way that is similar to that of Google Photos.
Way 2: Recover Deleted Photos Using File Recovery Software
What if users don't have backup on the cloud? Could it be possible to retrieve the photos that are accidentally deleted from the Samsung Galaxy S22 phone? Thankfully, there's another way to recover deleted photos. The piece of software that you'll want to try is called Android Data Recovery.
Using Android Data Recovery is certainly worth the outcome if you are determined to get back the lost photos on Galaxy S22 phone. It is a quick solution for Android users who lost their data due to accidental deletion, system glitches and file formatting. It performs a deep scan on device and searches for deleted contacts, messages, call logs, pictures, media files, documents and other file types. After that you can preview the found files in detail and selectively recover what you want.
Tutorial: How to Recover Pictures from Samsung Galaxy S22 Gallery
Step 1: Initiate the program and choose data recovery mode
Start the program on the computer and choose "Android Data Recovery" mode on the interface. Then make a connection between your Galaxy S22 phone and the computer via USB cable.

To allow your Samsung Galaxy S22 phone to be analyzed by the software, please turn on USB Debugging Mode on the device. If you have done it, skip this step. If not, follow the on-screen guide or visit the article on how to enable USB Debugging Mode on Android.
Step 2: Choose photos to be scanned
On the next window, you will be asked to select what file types to be scanned for deleted files. For the purpose of this article, we're going to searching for lost pictures on Galaxy S22, so here you may select "Gallery" and "Photo Library" and press the Next button.

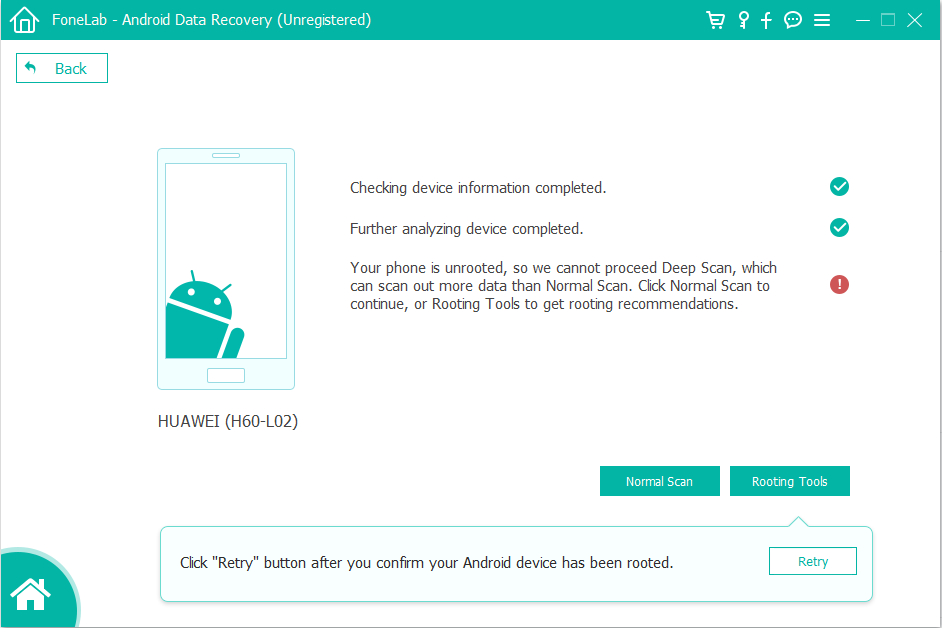
Next, the program will start analyzing your device and try to search for photos deleted on gallery in your Samsung S22. In order to gain access to the storage memory and scan the data thoroughly, you'll be prompted to root the Samsung Galaxy S22 phone.
To do so, click the Rooting Tools button at the bottom and this will take you to a site where you can install a tool named KingoRoot to root your device. More information, please visit: how to safely root and unroot an Android device.
When you're rooted, the software will initiate a deep scan over the data on your handset. You can see the rundown on how much time the scan will take. The whole process may need 15-20 minutes to be finished.
Step 3: Retrieve deleted photos from S22
Once the scan process is complete, it returns a list of files that resembles your selected file types.
To recover photos from Galaxy S22, click the "Gallery" (or "Picture Library") category on the left sidebar to display the images on the right pane. Then check the pictures you want to retrieve by ticking the small boxes next to name.

Now comes the clever bit! click the Recover button at the bottom right corner and it will ask you to select a folder path to store the reclaimed pictures in the dialog box.

After you've made your selections, hit the button again and the Samsung Galaxy S22 photos recovery will begin.
Once the process is done, you're ready to open the folder and check the recovered photos. Done!
The Google Way for Photos Backup and Restoration
Google provides a nice solution to back up and restore photos on Samsung Galaxy S22 phone with its Google Photos service. It gives you great convenience to manage the photos by different categories (date or person) and offers you free, unlimited storage for pictures that don't exceed 16 megapixels without swamping the device's storage space. Here is how.

You can tap Photos icon on Google Photos app to see if your S22 photos are backed up, or if it's still waiting to back up.
Google Photos app can be set to automatically back up every photo taken with Galaxy S22 handset to the cloud. You can set it to upload the pictures over Wi-Fi or using cellular data. You can decide which photos to be backed up to Google Photos, excluding those you don't want to save. Once you enable Backup&sync, you can access the photos at any device with your account.