A Full Guide to Extract iPhone Notes from iCloud Backup
Need an iTunes backup extractor to selectively get data out of backup in iTunes and restore to your iPhone or iPad? You are not alone. Read on to know everything about iTunes backup and restore.
You never know how much your iPhone's data matters to you until it is gone forever. As an iPhone user, you are encouraged to make a backup of your important data on a regular basis through iTunes (or iCloud). If you've done this before, thing gets easy.
In reality, restoring data from iTunes backup to iPhone is easier than you might think. For those who want to view backup files before extracting the data you want, you can even get some great tools that are perfect for getting the job done. Here's how to do.
You can use iTunes to make a comprehensive local backup to store the iPhone data files in the computer so that you can extract the data from iTunes when you need it back. Just a few taps on the screen and let iTunes works its magic.

Wait until the restoring process is complete. Recovering data from iTunes backup is feasible, but there are some limitations and drawbacks. When you use iTunes backup to retrieve data to iPhone, it performs a whole restoration other than letting you select what you want to recover. Worse still, the newly restored data will replace the existing data on the device.
We know how painful it is to revert your iPhone to previous state and lose the current data when doing a full restore from iTunes. Now, with Appgeeker iOS Data Recovery, a brilliant iTunes backup extractor, this issue will be steadily solved. It offers a more manageable solution, letting you access the data files in the iTunes backup and extract the data you need.
More importantly, the program comes with another two recovery modes that enables you to recover data from iPhone memory directly, or restore from iCloud backup.
Step 1: Select iTunes recovery mode
Launch the program on your computer. Click on the "Recover from iTunes Backup File" mode on the left side of the startup interface. The program will search for your computer and list all iTunes backup files on the interface.

Step 2: Scan a backup in iTunes
Select the most relevant iTunes backup according to the iPhone's name and latest backup date.
After selecting a backup, hit the Start Scan button. The program will start extracting iPhone data from iTunes backup and bring them on the interface, classified by file types.

Step 3: Recover data and save onto computer
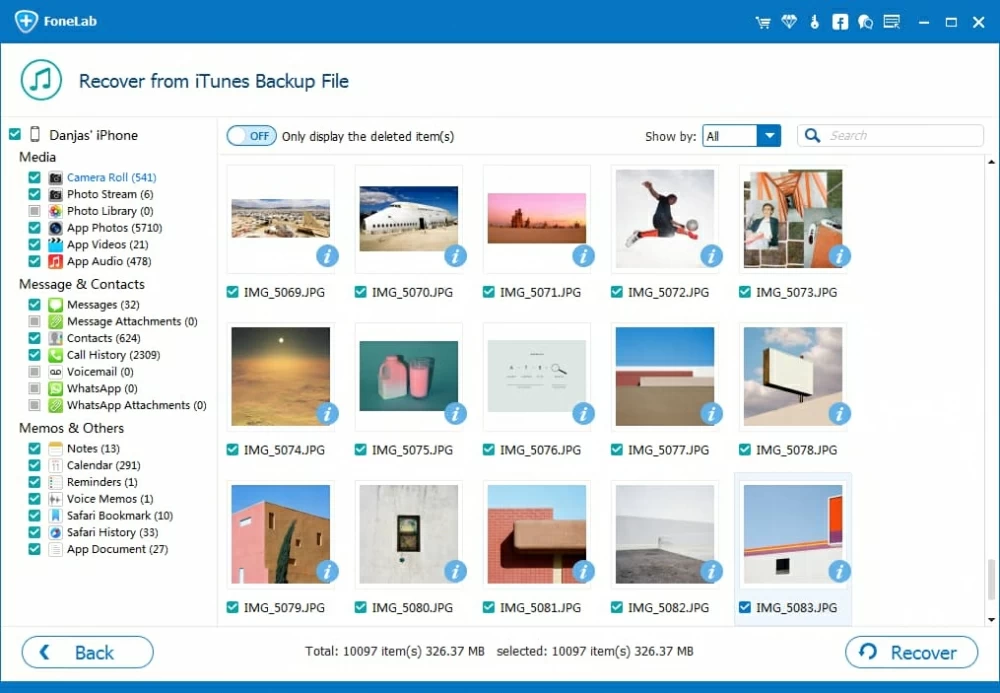
As you can see in the image below, all the files are classified by category like contacts, messages, camera roll, call history, voice memos, etc. You can click any one of the categories to preview the items in detail.
Go ahead and select the files you want to retrieve by checking the boxes next to items.

Then, press the Recover button at the bottom-right corner. In the dialog that appears, choose a folder to save the recovered data.

Again, hit the Recover button and the program will start retrieving backed up data from itunes backup and save onto computer.
That's it. If you want to restore iPhone without iTunes, you may follow our guide on How to Recover Lost Data from iPhone Without Backup.
How do you find iPhone backup files on Windows or Mac computer? The actual location of the backup folder varies, depending on what operating system you're running.
On Windows machine, you can locate your iOS backups by navigating to \Users\(username)\AppData\Roaming\Apple Computer\MobileSync\Backup\
Alternatively, you can manually locate a list of your backups:
Where are iOS backups stored on Mac system? You can find them by clicking the menu bar on computer, and entering ~/Library/Application Support/MobileSync/Backup/.
Alternatively, locate a specific backup:
You might want to know what is in iTunes backup before restoring to iPhone. By default, when you sync your iPhone with iTunes, it creates a backup archive with unreadable content. If you need to access and view data from the backup, you need a dedicated iTunes backup viewer like iOS Data Recovery mentioned in Option 2.