Get Messages Back from iPhone 6s without Backup
We all have been overzealous about deleting pictures stored on Photos app on our iPhone 8 (Plus) until we realized that some stunning photos should have been preserved.
Actually, the photos which you removed from Photos app are kept in the "Recently Deleted" album and stick around for a grace period of 30 days. So when you unintentionally delete the pictures but need them back later, you should take good advantage of the "Recently Deleted" album - go to check the folder and restore temporarily deleted images there with a couple of taps.
But what to do if your photos were deleted permanently from the iPhone 8 (Plus)? Most of the time we do have a backup of iPhone 8 in iTunes or iCloud, but there are times when the stuff is added so quickly that we couldn't back it up in time. Therefore, the pictures deleted from "Recently Deleted" album on iPhone 8 are not always included in iTunes & iCloud backup, then the issue arises: are those photos likely to be restored when there is no backups available?
Luckily, with no iTunes backup or iCloud backup though, there's still a good chance that you will get iPhone 8 (Plus) photos back. All you need is a file recovering utility that can recover photos from iPhone 8 (Plus) internal memory. Now, iOS Data Recovery is such a functional and user-friendly application that is capable of getting the job done easily - you just scan the device, choose which pictures you would like to bring back from the results, then let the program do the rest things.
The program lives up to its name by its powerful capability of recovering data from iDevice (iPhone, iPad, iPod Touch) instantly and effectively without the help of backups embedded in iTunes or iCloud. It will perform a deep scan on the device to find all the recoverable contents that you can choose to retrieve, including contacts, texts, calendar, app video & audio, notes, reminder, Safari history & bookmarks, call logs, and whatever.
One thing to keep in mind is that once you wipe off photos on your iPhone 8 (Plus), it is safe not to use your device before you recover the lost pictures. If you do so, the deleted pictures will be overwritten and it's not possible to get them back.
In this article, we'll walk you through the steps to work with this software so as to restore pictures from iPhone 8 (Plus)'s storage without backup copies needed.
Step 1: Run the tool and choose the recovery mode
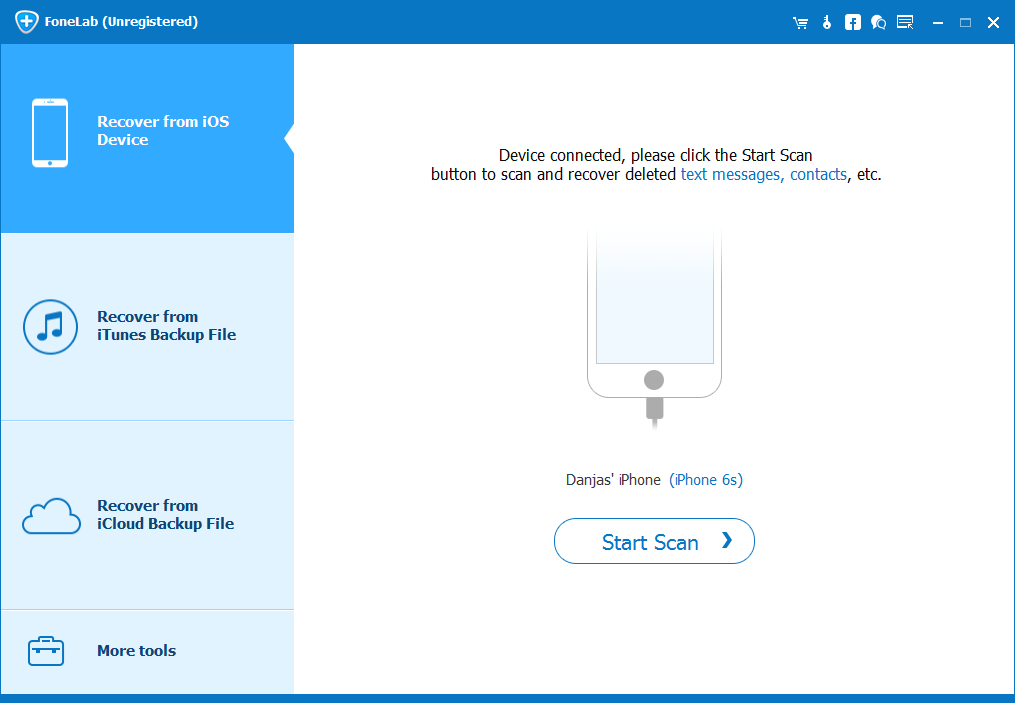
Launch the program on your computer. You'll see a straightforward interface that shows 4 options in plain view on the left portion, leaving no room for confusion.
On the left sidebar of the startup interface, click on "Recover from iOS Device" mode. You will then need to plug your iPhone 8 (Plus) into the computer through USB cable.

Once connected, the image of iPhone 8 (Plus) with owner's name and generation should be demonstrated on the center of the interface.
Step 2: Scan iPhone 8 (Plus)'s memory for deleted files
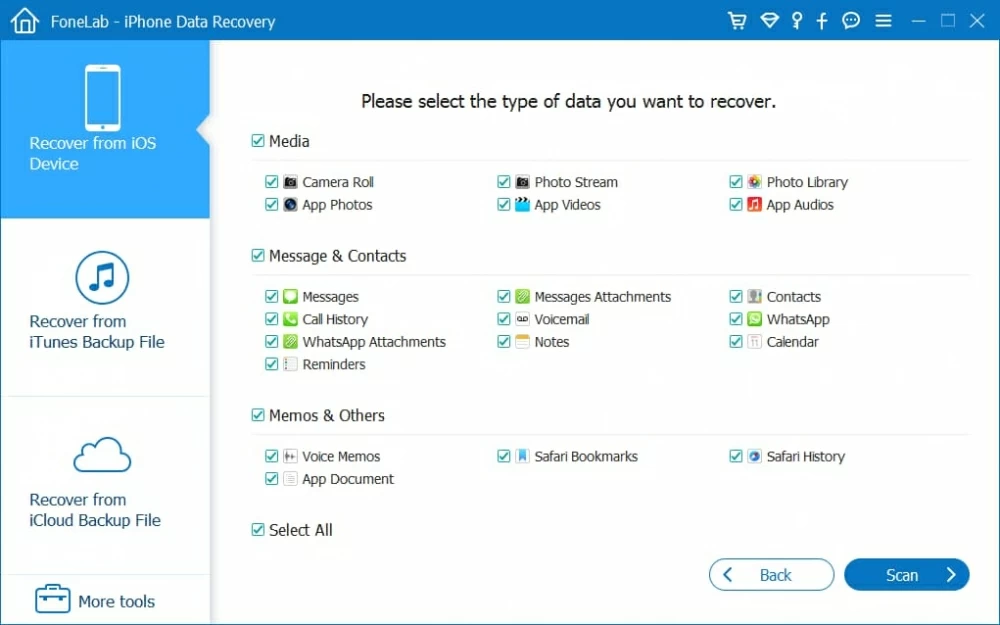
Select the photo data type (Camera Roll, Photos Library, Photos Stream) from the list and then press the Scan button and the program will start deeply scanning all of the areas on your iPhone 8 (Plus). This process will last a couple of minutes depending the amount of the data on the gadget.
Once it's done, the program returns you an overview and sorts all files into categories.

Step 3: Preview photos
The utility comes with the preview feature that enables you to have a preview for which files you want to retrieve back.
Click on "Camera Roll" category under "Media" section from the left pane of the interface, you will then notice all the pictures are shown in thumbnails in the part of the window to the right. Perhaps your lost photos are saved in other categories like "Photo Stream", "Photo Library" or "App Photos", you can enable it respectively and view the pictures.
"Only display the deleted item(s)" toggle on the top left of the right pane lets you limit the displayed results - once turn it ON, the program will show you just the files that you've deleted. And on its far right, the "Search" box makes it quickly to pinpoint the certain file you need by entering the related words.

Step 4: Start recovering process
Now, select the pictures you wish to bring back by clicking the checkboxes under the thumbnails.
Once selected, click the Recover button at the bottom right corner. In the dialog box that opens up, assign where you want those recovered photos to be saved.

Hit the Recover button in the window to fire up the iPhone 8 (Plus) photos recovering process.
Once done, you can now disconnect your iPhone 8 (Plus) from your computer and go to the folder to check the newly recovered photos.
Done! By using this method, you should get photos straight from iPhone 8 (Plus) with no previous backup required.
Conclusion
That's pretty much it. You will now have a clear idea of iOS Data Recovery application and how to perform a recovery task with it. Again, remember that you should always have a handy backup in the event of data loss on iPhone 8 (Plus). You can follow the instructions in our separate article on how to back up an iPhone locally and online.