How to Retrieve Deleted Call History on iPhone XS (Max)
Pictures are possibly one of the most important parts of your iPhone 6 (Plus). That being the case, it's important to make sure that all those precious memories are periodically backed up to a safe location. But if you do nothing to protect photos, then you run the risk of losing everything.
Deleted pictures on iPhone 6 (Plus) accidentally? Or lost photos due to an improper sync or fail iOS update, or even your photos disappeared from camera roll all of a sudden? Don't panic. There are a couple of viable solutions to help you recover photos on iPhone 6 (Plus). Depending on how you lose the photos, these methods can either be simple or more time-consuming.
The first way to find these so-called lost photos is through a Recently Deleted folder. When you deleted a picture from iPhone 6 (Plus), Apple gives you a chance to change your mind or revert mistake by recovering from Recently Deleted folder where the deleted photos stayed up to 30 days.
There, you've retrieved deleted photos on iPhone 6 (Plus).
If you clear the pictures in Recently Deleted folder, or the period of 30 days has expired, this method won't work. You'll need to skip to try the rest solutions below.
Backing up an iPhone 6 (Plus) in Apple's iTunes and iCloud is always necessary for keeping the photos safe around and retrievable in case of the unexpected disaster. If you have backups of your iPhone made with iTunes & iCloud, you can retrieve photos that were included in these backups.
Use iTunes to restore a backup to iPhone 6 (Plus)
Use an iCloud backup to restore photos on iPhone 6 (Plus)
If you don't rely on iTunes & iCloud restoration, you can use the 3rd party way to recover deleted photos on iPhone 6 (Plus) storage as long as they haven't been overwritten by other files. There are a lot of programs in the web for you to choose from, and iOS Data Recovery is our choice.
Its capability and flexibility have made it one of the most professional iPhone data recovery software on the market. It can recover almost everything you lost on your iPhone. It scans the device in a deep manner and sorts the lost files by data type automatically. It gives you the ability to preview the files and selectively choose what file you want to recover.
In addition, it comes with options to help you extract data from iTunes or iCloud backup. Unlike the Apple route—an all or nothing process when restoring from the backup, the program allows you and preview and extract photos only from the backup without erasing the current data on the device and replacing with the data inside the backup.
In this tutorial, we'll show you how to use the software to get back photos from iPhone 6 (Plus) memory.
Step 1: Run iOS Data Recovery
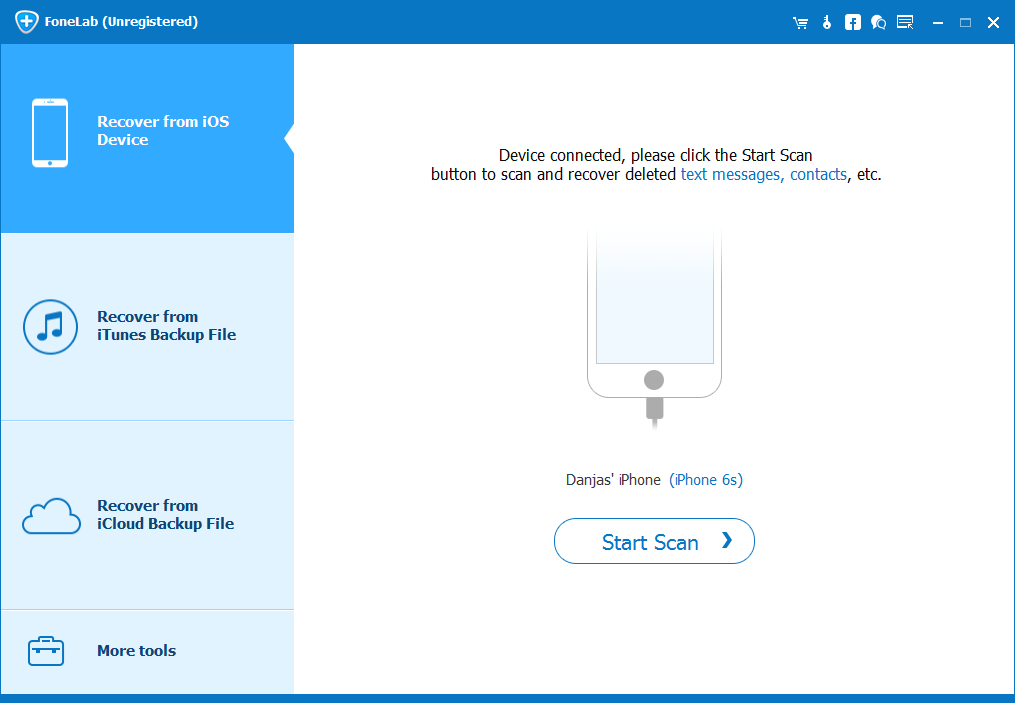
Launch the program and on the opening window, select "Recover from iOS Device" mode.
Connect the iPhone 6 (Plus) to the computer and the program will detect the device immediately and present you the image, user's name and generation of the device on the window.

Step 2: Scan iPhone 6 (Plus) to search for the lost photos
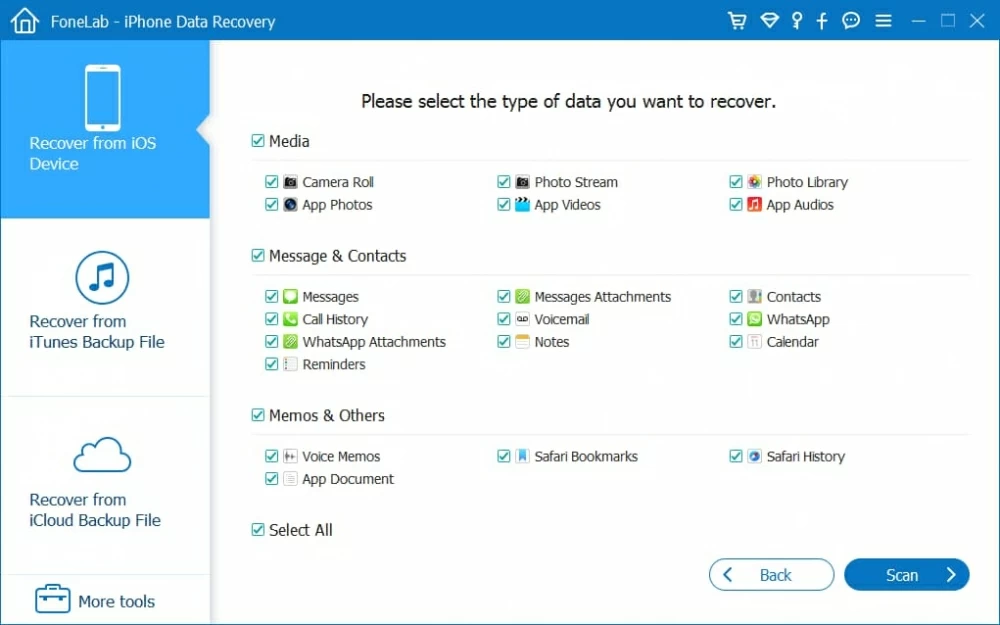
Select what data type you want to scan for lost files. In this example, check "Photo Library", "Camera Roll" and "Photo Stream" and then click the Scan button to let the program do a deep search on iPhone 6 (Plus).
Depending on amount of the stuff on the gadget, the scanning time it takes varies. You can check the progress bar to see whether the scanning is done.

Once the scanning is complete, all lost files it found will display on the window and grouped into categories that make it easy to preview.
Step 3: Retrieve photos from iPhone 6 (Plus) memory
Go ahead and select the pictures you wish to get back. To quickly find the photos you want, you can enable "Only display the deleted item(s)" option on the top center and the program will just show you the lost items.

Once selected, press the Recover button at the lower right place. This will pop up a dialog box, from where you specify an output folder for the recovered photos.

Finally, hit the Recover button again and the program will do its course. Just wait while the selected pictures are recovered and saved to the specified folder on your machine.