
How to Restore iPad from iPhone Backup
Need to backup your iPhone photos? Explore this comprehensive guide for swift and effortless methods to backup your iPhone photos to iCloud or your computer.
Accidental deletion, device damage, software glitches, or theft can result in permanent loss of your precious photos. By creating iPhone photo backups, you can ensure that your pictures are safe and can be easily restored if any such incidents occur.

You've got different options to back up your iPhone pictures easily and quickly.
It's just a breeze to back up the photos on your iPhone. Wireless options like iCloud allow you to back up your iPhone photos to the cloud, so you can see the pictures on any other devices logged in with the same iCloud account.
Alternatively, you can backup your iPhone photos to a Mac or PC with a proper tool. Built-in programs like the Photos app, or some reliable 3rd-party utilities like iOS Data Backup & Restore can be of great help for you to back up your iPhone pictures to a computer efficiently.
Table of Contents
iCloud is Apple's cloud storage service that makes it easy for you to back up your iPhone photos wirelessly and seamlessly. However, it provides only 5 GB of free storage, which can quickly be consumed, especially when it comes to storing a large number of high-resolution photos. If you need more iCloud storage, you can purchase additional iCloud storage plans at a monthly cost.
Here's how to enable iCloud Photos on your iPhone to backup the pictures: Go to Settings > Your name > iCloud > Photos > Sync this iPhone.
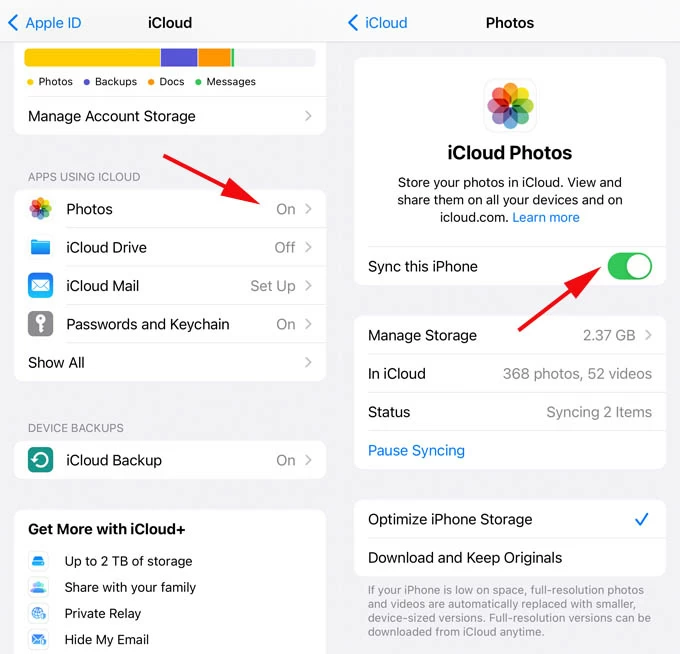
Once you turned it on, your iPhone photos will be automatically backed up to iCloud. And you can check the photos on any devices by logging into icloud.com in a browser with the same Apple ID account used on your iPhone.
Wondering how to stably and efficiently back up your iPhone photos? Try this brilliant software iOS Data Backup & Restore to back up your photos from iPhone to computer with ease!
Compatible with Windows and macOS, it can easily back up all your iPhone photos to your computer in high resolution. After the backup, you can also preview the photos on your computer screen in a larger size. Moreover, besides iPhone pictures, it allows you to backup other data types such as videos, messages, notes, contacts, bookmarks and voice memos, etc. Below, let's see how to back up your iPhone photos to a PC using this utility.
1. Launch the software on your computer, and attach your iPhone to the PC using a cable. Make sure to allow the computer to access your iPhone by tapping "Trust" on the device.
2. Click "More tools" in the bottom left corner, and then select the "iOS Data Backup & Restore" tab on the next page.
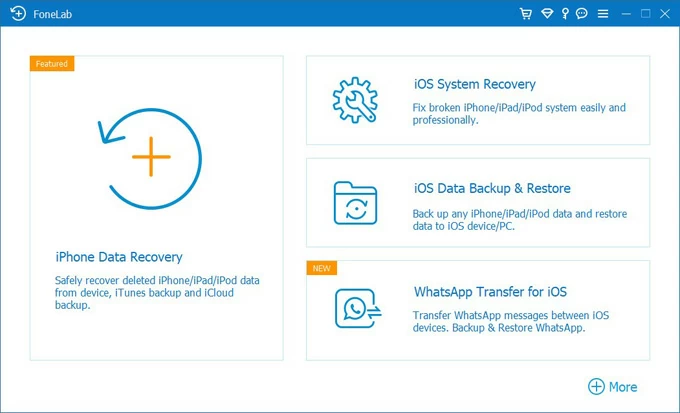
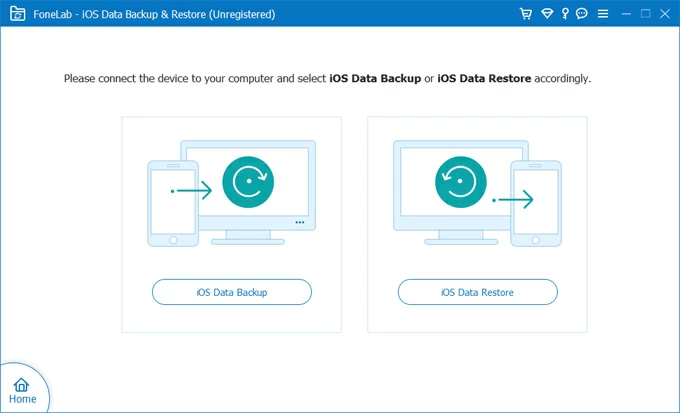
3. Choose "iOS Data Backup" on the left, and hit "Start" on the new page.
4. Check the box next to "Photos" beneath the "Media" section. If you want to back up other data, you can also select the specific data type as per your needs.
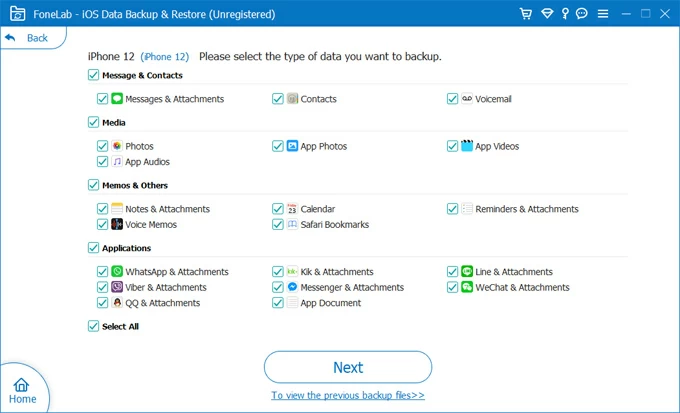
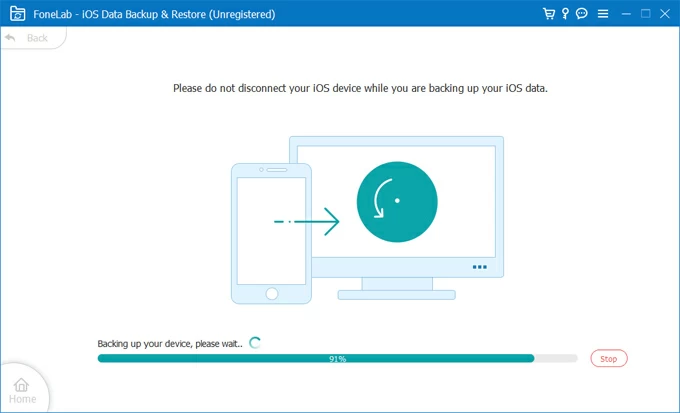
5. Hit the "Next" button below, and the iPhone photos backup will begin. When it's done, you can check the photos in the backup library.
There're built-in tools on Mac and PC for you to backup your iPhone pictures. They're both called the Photos app, but completely different from each other for their individual compatibility with macOS and Windows systems, as well as the features and the interface.
The Photos app on Mac is a versatile and user-friendly application designed to help you organize, edit, and share your photos and videos. It is the default photo management software on macOS, providing a comprehensive range of features to enhance your visual memories.
Learn more: How to find iPhone backup on Mac [Ultimate Guide]
Here's how to back up iPhone photos to a Mac computer:
1. Connect your iPhone to the computer with a wire attachment, and tap "Trust" on the device if asked to trust the Mac or not.
2. Open the Photos app on your Mac, and you can see the Import screen showing all the photos on your iPhone automatically.
If it doesn't appear, click your iPhone's name beneath the "Devices" section on the left bar, and you'll get the Import screen.
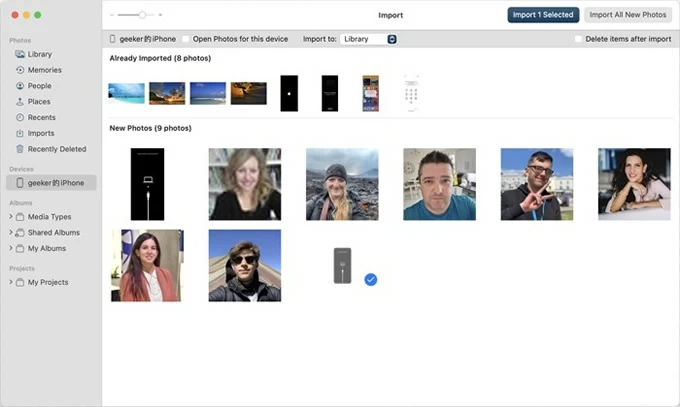
3. Select an album next to "Import to" for saving the iPhone photos before you start the backup.
4. Choose the photos you want to back up and click "Import Selected" in the upper right corner of the Photos window. Or you can click "Import All New Photos" to back up all the iPhone photos.
There's also a Photos app on every Windows 10/11 computer that helps back up the photos from your iPhone to your computer. Check out how to back up iPhone photos in this way below.
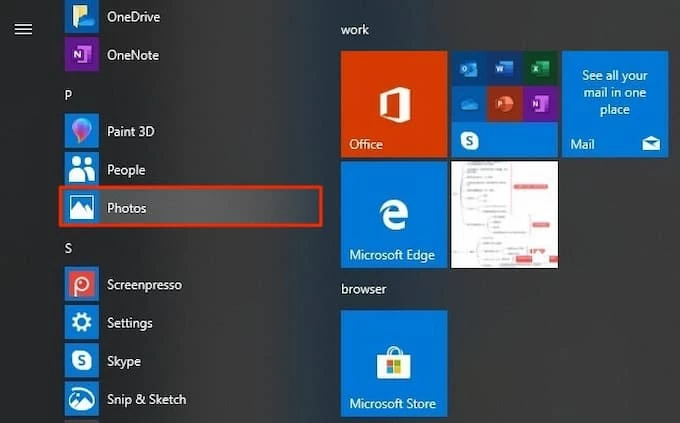
1. Launch the Photos app on your PC, and use a cable to plug your iPhone into the computer. You can find the Photos app from the Start menu.
2. Click "Import" on the top-right corner of the window, and select "From a connected device."

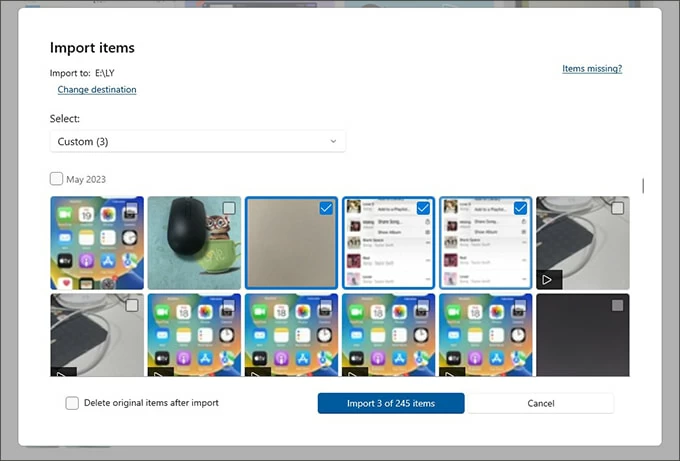
3. Select the iPhone photos you need to back up to your computer, and click "Import ... of ... items" beneath to start the photos backup.
Note: Ensure that you've installed the latest version of iTunes on your Windows PC beforehand.
Related: How to access iPhone photos on PC in 4 quick ways
Conclusion
There're plenty of useful ways for you to back up your iPhone photos easily. To make an automatic iPhone pictures backup, you can use iCloud to back up the photos to the cloud, but you have only 5 GB of free storage space to save the pictures.
Or you can manually back up your photos from your iPhone to computer using the Photos app or the 3rd-party software iOS Data Backup & Restore. For Windows users, File Explorer can be used to back up the iPhone images to a PC, too. And for macOS users, you can also AirDrop your photos from iPhone to Mac, or use Image Capture to back up the iPhone photos.
Just take a way you like to back up your iPhone photos!