How to Transfer Music from iPhone to iPad


Platforms
Developed for both Windows & Mac users

AirDrop is a handy function for seamless file transfer between Apple devices, and sometimes you may need to AirDrop photos from your iPhone to a Mac. Here's how to.


You can easily send your iPhone photos to Mac with AirDrop when the devices are close to each other.
AirDrop, as a highly convenient and essential file-sharing feature within the Apple ecosystem, allows you to quickly send photos from iPhone to Mac, especially when you need to transfer a small selection of photos instantly. Relying solely on Bluetooth and Wi-Fi technology, you can AirDrop photos from your iPhone to your Mac wirelessly, significantly boosting efficiency in both work and daily life.
In this guide, we'll show you how to AirDrop photos from iPhone to Mac like a pro. From setting up your devices to troubleshooting common AirDrop issues, we've got you covered. But if you need to transfer a large number of iPhone photos to your Mac at once, we recommend using iPhone Data Transfer tool for batch transfers.
Table of Contents
AirDrop is Apple's built-in wireless technology for sharing files directly between Apple devices, introduced in 2011 with iOS 7 and macOS Lion. It leverages a combination of Bluetooth and Wi-Fi to create a peer-to-peer connection between devices, letting you AirDrop your photos to Mac from iPhone without needing an internet connection or external apps.
It uses Bluetooth to detect nearby compatible devices, then establishes an encrypted, high-speed link over Wi-Fi to AirDrop photos from an iPhone to a Mac while maintaining their clear, high-resolution quality, making it an ideal and secure choice for iPhone-to-Mac photo transfers.
Before you can start AirDropping photos from an iPhone to your Mac, it's essential to ensure both devices are properly set up.
Check Compatibility: Your iPhone should run iOS 7 or later, and your Mac should be of Mac OS X Lion (Mac OS X 10.7) or later.
Enable Bluetooth and Wi-Fi: Both Bluetooth and Wi-Fi must be turned on for AirDrop to work.
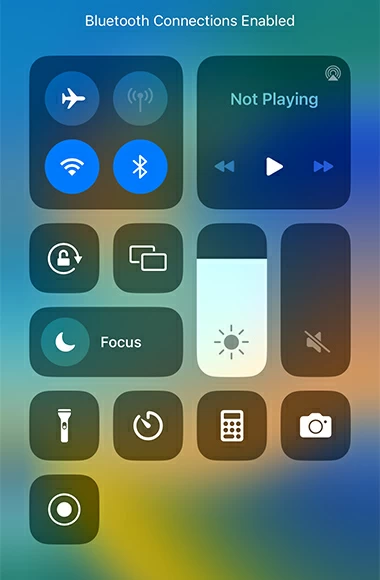
Adjust AirDrop's Visibility: Allow your device to be discovered within Bluetooth and Wi-Fi range.

Physical Distance: Make sure your iPhone and Mac are close together, preferably within 30 feet.
If a reverse direction transfer is needed, AirDrop is also capable of moving photos from Mac to iPhone.
Once everything is ready, you can follow the specific steps to transfer your desired photos from your iPhone's Photo Library or other apps to your Mac via AirDrop.
1. On your iPhone, open the Photos app or the app where the photos you want to AirDrop are stored.
2. Select the photos you need. If you choose photos from the Photos app, tap Select in the upper right corner to pick multiple photos.
3. Tap the Share icon in the bottom-left corner and choose the AirDrop option.
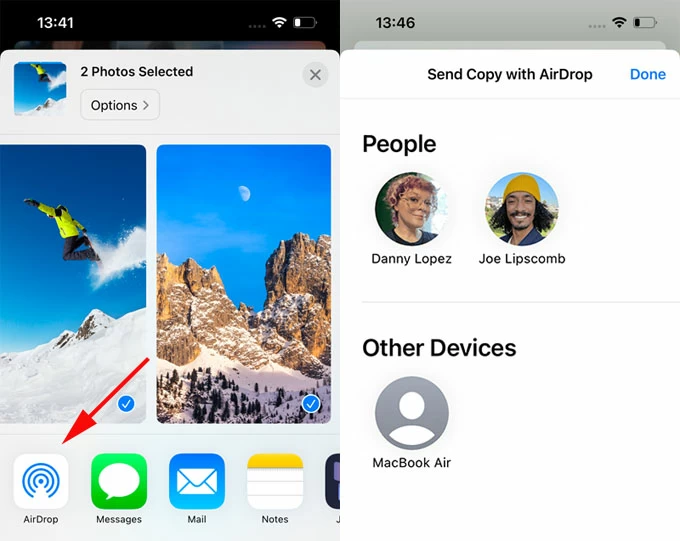
4. Select Mac as your target receiving device. Nearby devices or users that can receive photos will be listed in the AirDrop a Copy menu. In the Other Devices section, select your Mac name.
5. Accept the AirDropped photos on your Mac. A notification will pop up in the upper right corner on the desktop asking whether to accept or decline the shared photos. Click Accept to get the photos from your iPhone on your Mac.

Tip: If your Mac and iPhone are using the same Apple account, you will not get a query window and the photos will be automatically sent to your Mac and saved.
By default, AirDropped photos will be saved in the Downloads folder while keeping their original format and quality. To access the photos you sent from iPhone, you can open the Finder and click Downloads in the sidebar. You can also use AirDrop to transfer music from Mac to iPhone.
Note:
While AirDrop offers the most straightforward way to transfer photos across devices, it's better suited for sharing a small number of photos. If you use AirDrop to share a large quantity of pictures, it can easily lead to transfer failures or slower speeds.
Therefore, to move a large photo library from your iPhone to a Mac, you can try iPhone Data Transfer, which allows you to transfer all your photos from iPhone to Mac without losing quality in one click. Besides, it can convert HEIC photos to JPG and PNG formats for broader device compatibility. In addition to photos, it also supports two-way transfers of videos, music, messages, and other data between your iPhone and Mac.
1. Download and install iPhone Data Transfer on your Mac, then run it.
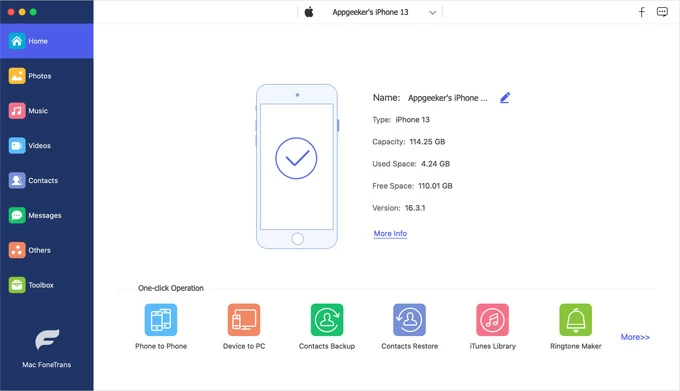
2. Unlock your iPhone and connect it to your Mac using a compatible USB cable. If prompted, trust the computer on your iPhone.
3. Navigate to the Photos tab on the left sidebar, and you can preview all the photos from your iPhone, including those from the Camera Roll, Photo Library, Live Photos, and various apps.

4. Select photos to transfer. Check the photos you want to move to your Mac for storage, click the computer icon in the top task menu, and then choose a destination folder to save your photos locally on the Mac.

Read more: How to transfer music to iPhone without iTunes
The process of AirDropping iPhone photos to Mac isn't always smooth. If your photos fail to send from your iPhone to your Mac via AirDrop, you can follow the guide below to troubleshoot and fix it.
Check if both your Mac and iPhone have Bluetooth and Wi-Fi enabled.
Ensure both devices are within Bluetooth range. The closer the two devices are, the more stable the signal will be.
Restart your iPhone and Mac.
Update your iPhone and Mac to the latest iOS and macOS versions.
Verify that AirDrop settings on both your iPhone and Mac are configured to "Contacts Only" or "Everyone." If set to "Contacts Only," ensure the receiving device is in your contacts list. In iOS 16.2 or later, if you select "Everyone for 10 Minutes," the visibility will switch back to "Contacts Only" after 10 minutes.
Personal Hotspot is turned off.
Reduce the number of photos being shared and send them to your Mac in batches.
Conclusion
AirDrop makes sending photos from iPhone to Mac or transferring iPhone photos to MacBook Air fast, secure, and wireless. You've learned its tech basics, setup steps and troubleshooting fixes. Alternatives like iPhone Data Transfer tool add flexibility when needed. Now, you can send a single shot or a whole album with ease.