How to Get Lost Contacts Back from LG Android Phone
If you don't have created a duplicate copy of the photos on your iPhone X via iTunes or iCloud, don't give up hope and you still have one solution to get your photos back without using backup file. Follow the tutorial on how to restore photos from iPhone X storage.
Decide to clear trashy pictures in the Photos camera roll, right? There's nothing wrong with this. To keep things safe, the iPhone X will keep your deleted photos in the "Recently Deleted" album for 30 days so that you can get them back once you change your mind later on. At the same time, Apple provides you with an effective way to back up the device with iTunes or iCloud regularly.
The bad news is, not everyone is the punctual individual when it comes to backup of your device, especially for the shutterbugs - they may always empty the "Recently Deleted" album by quickly tapping on the screen of iPhone X when on the verge of running out of the memory space. It's surprising that how fast a tap of "Delete" option can make you hopeless until you realize you should have kept those pictures and backed them up.
In the absence of iTunes backup, iCloud backup or other duplicates, you have no immediate access to those lost photos. So, how can get them back? Don't worry, photos recovery on iPhone X without backup don't have to be hard as you might think. While there are a plethora of programs in the web that you can use to restore photos on iPhone X without backup, iOS Data Recovery is our go-to tool given its high success rate in data recovery even there's no backup taken.
This program does a great job of restoring data files from iPhone internal memory in case of no backup files available. Of course, it includes options to help you extract files from backups if you've created with iTunes or iCloud. Equipped with a sleek interface, the files recovering process is pretty simple — scan your device, select certain files from the results and you're ready to go.
We've rounded up the steps of restoring pictures from iPhone X directly - without needing a backup. Read the handy guide below so you know how to perform the task.
Step 1: Plug iPhone X into your computer
After installation of this program on your computer, launch it and you're ready to perform the process with on-screen text instructions.
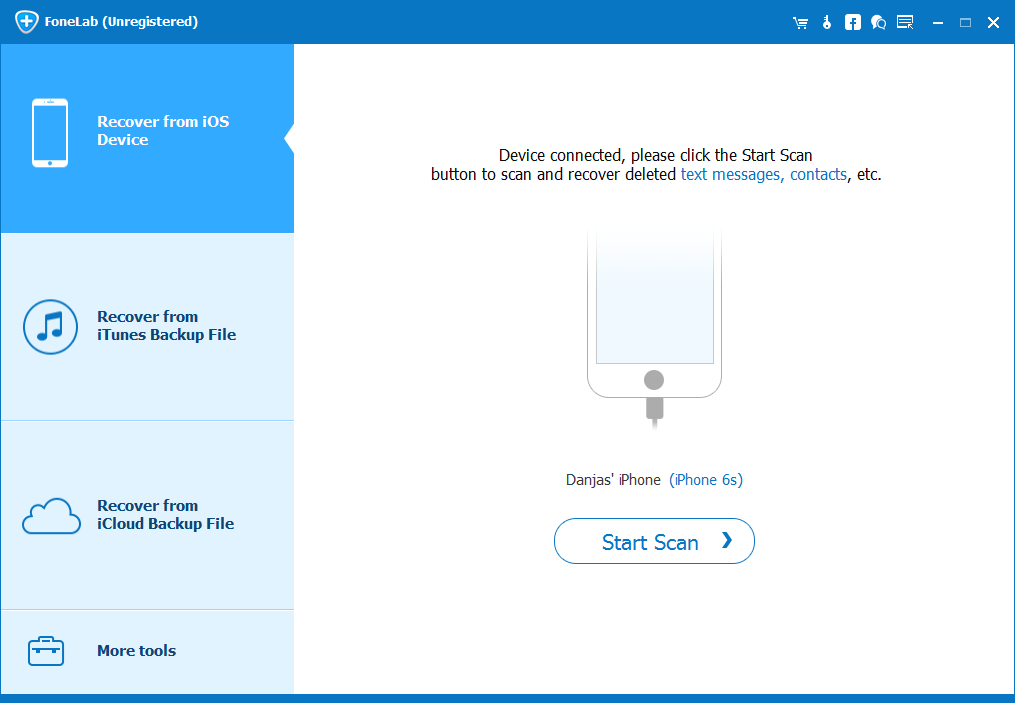
Since there are no previous iPhone X backup available, click on the "Recover from iOS Device" mode, and the software will prompt you to build connection between your iPhone X and the computer.
Once attached well, the program will initiate a quick detection and present you the image of your iPhone X with its name and generation on the right pane.

Step 2: Scan memory of iPhone X for deleted files
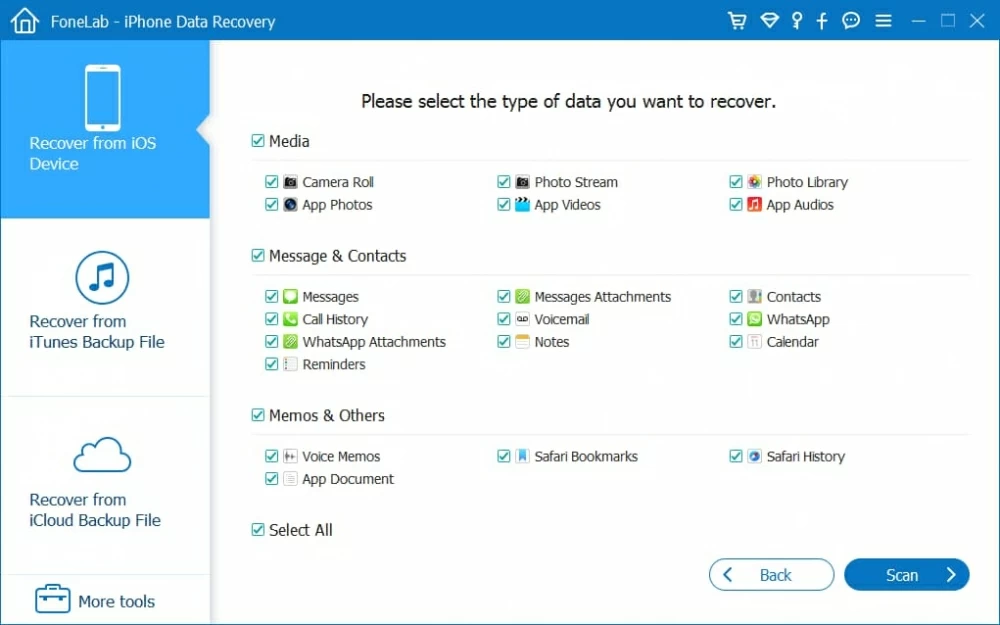
Go ahead and select "Photos Stream" "Camera Roll" and "Photo Library" options, followed by Scan button to let the program goes to work, scouring your iPhone X for deleted files. Depending on how many files are kept in iPhone X, the process it will take may vary.
Once the scan is done, the utility will lead you to a new window where all the files it found categorized by file types. You can see the exact number of items for each category.

Step 3: Make a preview for the photos
You can click any of the categories listed on the left pane for files preview on the right pane.
To preview pictures, you just select "Camera Roll" option or ("Photo Stream", "Photo Library", "App Photos" category) under "Media" section from the left pane, then all the photos will automatically show up as thumbnails on the right pane.
If there are a large number of photos on the list, you may slide the toggle "Only display the deleted item(s)" (see top center) to the ON status to narrow the results.

Step 4: Click the "Recover" button to recover photos
Now, click the checkboxes under each thumbnail to select photos you want to recover.
Once you've had all your desired photos selected, move the mouse cursor to the lower right corner of the interface and click the Recover button. This program will prompt for a place you want to restore the iPhone X photos to. You can make no changes as the default output folder has already been set.

Go ahead and hit the Recover button again to start restoring deleted photos on iPhone X. Just sit back and let the program do the rest things. Give it some time while your deleted pictures are being recovered!
Once completed, navigate to the folder which houses the recovered iPhone X photos and check all of them. Done!
Conclusion
The task of restoring photos on an iPhone X without backup seems impossible and troublesome, but iOS Data Recovery makes all go smoothly and easily. Anyway, the best way to keep your files safe is create backups of your iPhone X on a regular basis in the event of devastating data loss.