
iPhone Text Messages & iMessages Disappeared
Looking for an optional way to back up iPhone without relying on computer? Take it easy - this post teaches you how to backup the iPhone without computer.
If you've felt the pain of your iPhone being traded in, lost or damaged with your photos, videos, text messages, contacts and other data gone, or want to avoid it, a wise option is to back up your iPhone, keeping a copy of all information at hand. Apple comes with iCloud and iTunes/ Finder included for backing up iPhone easily - no additional download required.
This article outlines how to backup iPhone without computer. When you're not sitting in front of your computer, you can use iCloud to make an iPhone backup wirelessly over Wi-Fi, as long as your iCloud account gets enough available iCloud storage for saving the backup. You'll also learn tips and tricks on how to back up iPhone using a computer by means of iTunes/ Finder, or a stable iPhone backup tool called iOS Data Backup & Restore.

If you don't have a computer or USB cable, or even your computer become inaccessible, use iCloud to backup the iPhone.
Dive into the option below to back up iPhone with no use of computer using iCloud and save all your data into iCloud storage. There's no need of plugging your device into a computer to back up iPhone data.
You can bypass your computer by backing up your iPhone to iCloud wirelessly and automatically. With iCloud Backup enabled, almost all of data and settings stored in the iPhone will be uploaded to the iCloud server.
To initiate an iPhone backup via iCloud without connecting your phone to the computer or without iTunes/ Finder, do the following:
1. After your iPhone is connected to Wi-Fi network connection, open Settings app.
2. Tap [your name] > iCloud > iCloud Backup.
3. Turn on the toggle for Back Up This iPhone to enabled iCloud backup feature.
4. Tap Back Up Now to kick off an instant iPhone backup. You can manually back up the iPhone without a computer by tapping Back Up Now at any time.
A progress bar "estimating time remaining" will then appears while iPhone is backing up data - wait until it completely loads. Ensure your iPhone stays connected to Wi-Fi to have your device content and settings backed up.
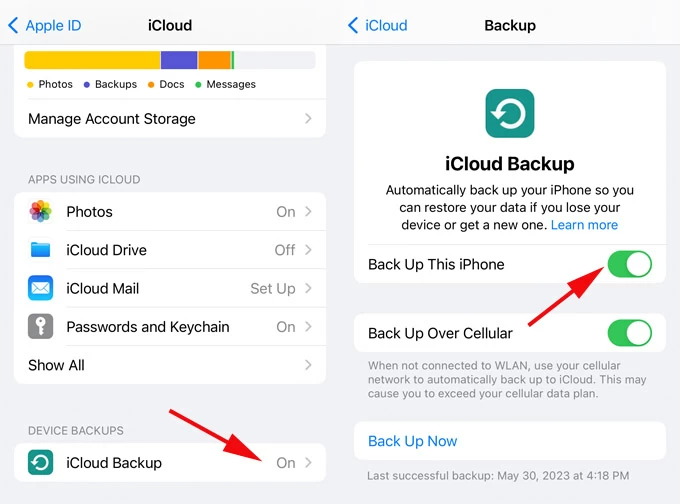
As soon as you turn on iCloud Backup feature, a backup of iPhone automatically makes every 24 hours after the last successful backup. For an automatic backup to happen, your iPhone has to be turned on but screen locked off, connected to Wi-Fi network, hooked up to power and iCloud has sufficient storage space.
Once iCloud has implemented a new backup, you can see date and time when your iPhone was successfully backed up Under Back Up Now. You can also view your iCloud backups in Settings > [your name] > iCloud > Manage Account Storage > Backups.
TIP: While iCloud backup is a convenient solution to back up your iPhone without the need of computer, you'll find that lack of iCloud storage prevents the iPhone backup from succeeding. Apple doles out a basic plan with 5GB of iCloud free storage for each Apple account. To make sure your data on iPhone is getting backed up to iCloud, you need to invest in iCloud+ plan where you can get up to 2TB storage.
When iCloud is activated to backup an iPhone without it being physically connected to computer or iTunes, you'll keep a copy of nearly all data and settings. However, there are some pieces of data cannot be backed up:
Bonus Tip: If you've accidentally deleted photos on your iPhone and never backed up the pics, read the tutorial on how to recover lost or deleted photos without backup.
By far, you've known how to backup iPhone without computer, especially when you don't have a computer nearby, or you can't make a successful connection with the computer via broken USB cable.
If you're considering backing up iPhone data to computer, use Apple's default backup route - iTunes or Finder. You'll need an accessible computer to back your iPhone up. Here's how to back up your iPhone using a Windows PC or Mac.
Using Windows PC, and Mac with earlier versions of macOS:
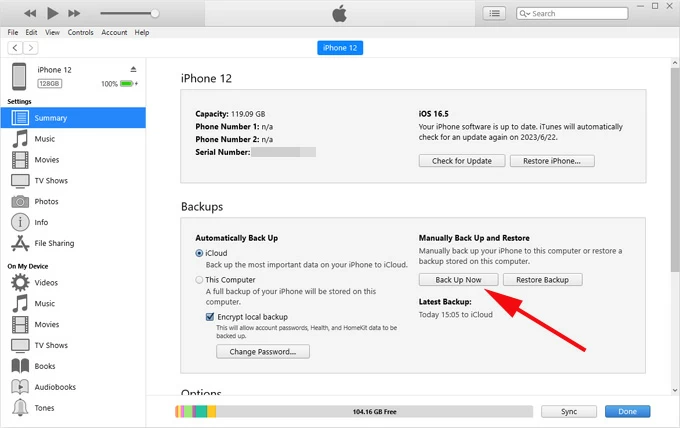
1. Launch iTunes.
2. Connect your iPhone to your machine. Unlock your iPhone for accessibility. If the iPhone is unavailable, seek help with page we've covered.
3. In iTunes window, click the tiny device icon that is presented at the top-left corner.
4. Click Summary from the left column in iTunes window.
5. Check "Encrypt local backup" option if you need to backup Health and Activity data from your handset. Set a password for the backup.
6. Hit Back Up Now. Let iTunes backs up your iPhone on computer and wait till it ends.
Using a Mac operating macOS Catalina 10.15 or later
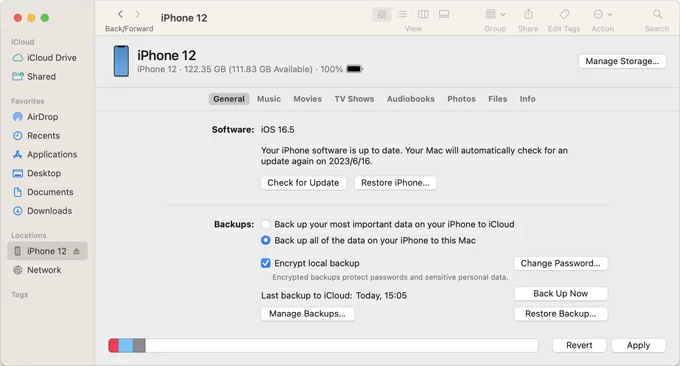
1. Open Finder.
2. Attach your iPhone to your Mac.
3. Locate your iPhone under Devices on the left sidebar.
4. Click General at the top of Finder window.
5. Select the checkbox next to "Back up all of the data on your iPhone to this Mac" option.
6. To encrypt your computer backup of iPhone, check "Encrypt local backup" option.
7. Click Back Up Now to begin backing up your iPhone data to computer.
Another approach to let iPhone back itself up with computer and save all of data locally is using iOS Data Backup & Restore. The software allows you to do a complete backup for iPhone without iCloud or iTunes. Backing up iPhone over Wi-Fi without computer is not that stable and an iCloud backup might be interrupted randomly.
All iPhone content can be backed up efficiently including iMessages, SMS, MMS, notes, photos, contacts, videos, voice memos, calendar, reminders, app data and many more. You can also choose to back up certain files on iPhone without conducting a full backup, which saves space on your computer. After iPhone being backed up, you're given option to preview the backed-up files and selectively restore to your device or computer.
Similar to iTunes, this iPhone backup software offers Encrypt Backup function to protect your private information with a password for your Health and Activity data.
Follow these steps to back up your iPhone:
Step 1: Fire up the application once it's installed.
Step 2: Click More tools tab at the bottom left corner.
Step 3: Choose iOS Data Backup & Restore module for backing up iPhone.
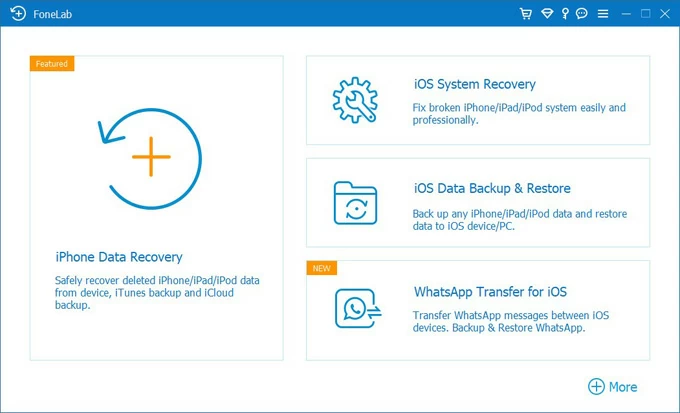
Step 4: Proceed to select iOS Data Backup mode.
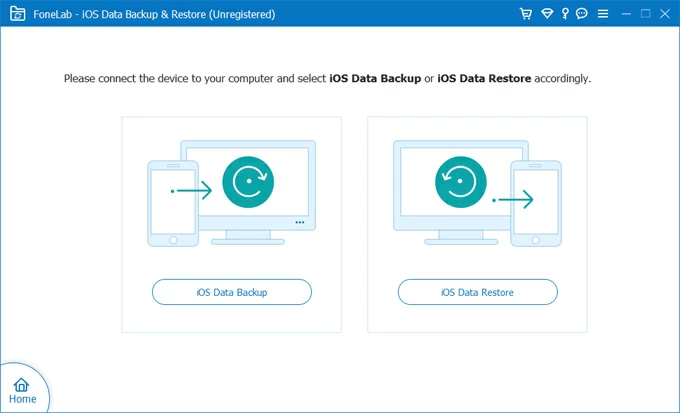
Step 5: Plug your iPhone into your computer through a USB cable. If asked to Trust to This Computer, tap "Trust" on the prompt, and then your computer has access to your iPhone.
Step 6: Select "Standard backup" option and then click Start button. Alternatively, check "Encrypt backup" option to make your backup protected with a password.

Step 7: Choose exactly what data is backed up to computer.
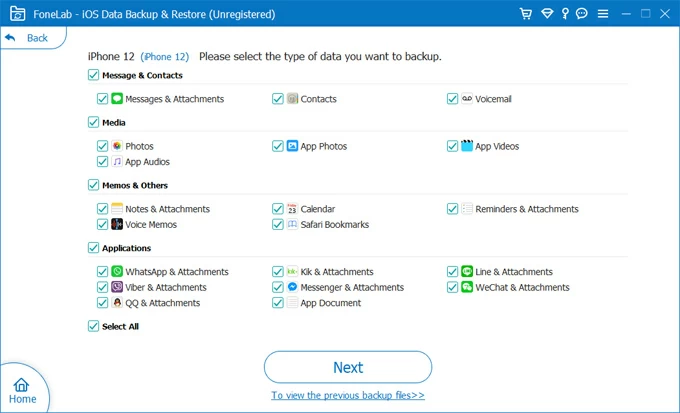
Step 8: Hit Next button. Specify a save folder and the backup process begins automatically. Wait patiently for your selected data files in iPhone to back up.
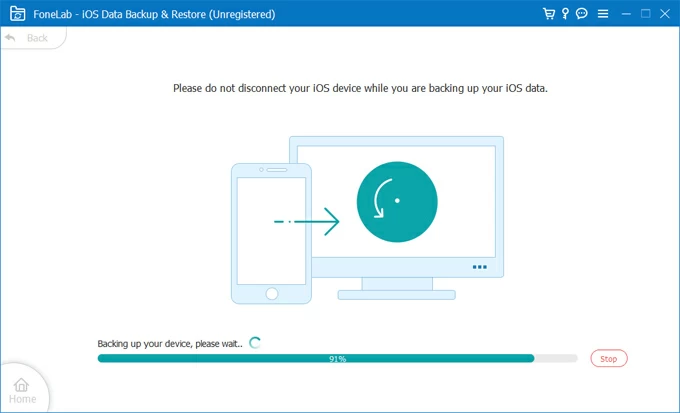
That's done! You've successfully backed up your iPhone to computer without iTunes/ Finder.
Read Next: How to Transfer Photos from Windows PC to iPhone
Conclusion
Apple provides native tools to back up iPhone, and if you'd like to preserve your iPhone backup in iCloud rather than on computer, then it's time to use the Option 1 above of using iCloud to backup iPhone without a computer.
Of course, you can always use iTunes/ Finder to back up all the iPhone data or use AppGeeker iOS Data Backup & Restore to make backups of your device, in case W-Fi network is unstable as well as the 5GB free iCloud storage isn't enough to accommodate your data.