
How to transfer music to iPhone 15
Accidentally empty your Trash on Mac and permanently deleted files you need? There's still a chance that you can undo empty Trash to get your lost files back on your own.
To recover emptied Trash on Mac:
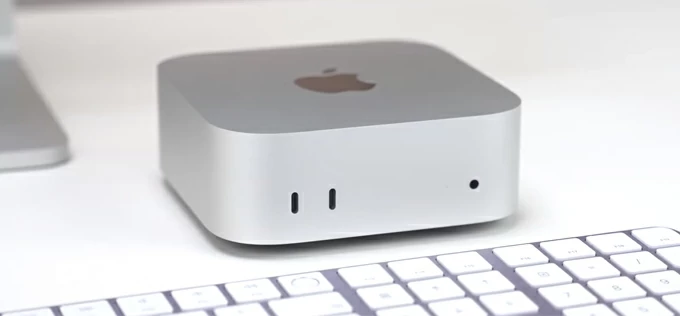
You're able to restore an emptied Trash from Time Machine, iCloud Drive, or using file recovery programs.
Getting rid of junk in Trash Bin to clear up some more storage space can be cathartic, but sometimes, if you accidentally hit "Empty Trash" when trying to recover deleted files on your Mac, things get tricky. We've all been there.
No matter you empty the Mac Trash on accident, or you even delete files on purpose but find out that you need the files, don't worry. Emptied Trash recovery on Mac is possible. The process isn't guaranteed, and you might need to try several approaches before you find what works.
Here's everything to know about how to recover emptied Trash on Mac, if you accidentally moved files into Mac Trash and then hit Empty Trash. The guide applies to all Mac devices: including iMac, MacBook Pro, MacBook Air, Mac Mini, and Mac Pro.
Table of contents
When you wrongly delete your files and then clear them from your Mac Trash, it takes a while for macOS to erased them permanently. Assuming your deleted files are still fully intact in system without being overwritten by new files, you get a great chance of recovering your files from empty Trash. The shorter you wait, the more likely you are to have good results.
Here are some quick, easy ways to recover files after emptying Trash Bin on your own without take the machine to a professional data recovery service.
I'm sure you've already used the Trash to restore files. If you deleted a lot of stuff recently, and are uncertain the files you need back were erased when you emptied the Trash once, we recommend double-checking the Trash to see if they are still there.
You may open Trash bin, right click, go to "Group By" to sort the deleted files by Name, Kind, Date, Size, and other criteria. You can also search for a file by using the search icon at the top right. Once you find the file you wish to recover, right-click on it and select "Put Back." It will restore to its original location on Mac.
This might not work if you've emptied the Trash and nothing left, but it's worth a check first.
Also: What to do If you forgot iPad password
What if you empty Trash and permanently deleted a file in your Mac? Apples offers its Mac based backup utility, Time Machine, with which you can regularly back up your data on the Mac to a backup disk. If your Mac is set to back up to Time Machine, you may be able to undo empty Trash using a recent backup.
Note, Time Machine will revert your Mac back to the state when you created that backup, meaning that you may lose some other newer data since the backup while it can help you restore permanently deleted files after emptying the Trash on Mac.
1. Access Time Machine
Make sure you have connected your Time Machine backup disk to Mac, and open a window or specific folder for the file(s) that you want to restore.
Next, click the Apple menu icon on the menu bar, select System Settings > General > Time Machine to open it. Alternatively, click the Time Machine icon in your menu bar, then select "Enter Time Machine."

2. Navigate timeline
You will get a screen with all of your available Time Machine backups. Use the timeline on the right side of the screen to see when the backup was made.
3. Select the file or folder to restore
Select the file and press Space Bar to preview and ensure it's the one you want.
4. Restore
Finally, click the "Restore" button. The deleted file will restore to its original location.
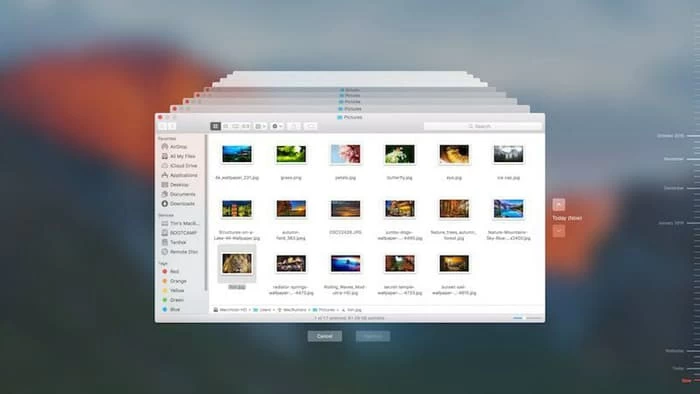
Done! You've successfully recovered files you emptied in Trash on Mac.
Also: How to add music to iPhone without iTunes
Time Machine's timeline may also include local snapshots — which save for files you've recently changed and are stored in your Mac hard drive — for you to recover empty Trash. Time Machine saves local snapshots of the files on your Mac for 24 hours. If you empty your Trash and delete files in the past 24 hour, you may try restoring from a Local snapshot.
If the files are important for you, and you don't have any Time Machine backups to recover accidentally emptied Trash on a Mac, you may want to consider a dedicated file recovery program.
There are a variety of such kinds of programs are available to choose from, we've had success with Mac Data Recovery. Available for Windows and macOS, the program supports recovery of files on a Mac after trash is emptied, no matter they are stored original in a mechanical hard drive, SSD, USB drive, flash drive, digital camera, memory stick, or SD card.
If you're new for empty Trash recovery with a dedicated file retrieval program, follow these steps to learn how to use Mac Data Recovery.
Step 1: Run the program
The program starts with a very friendly interface that won't confuse you.
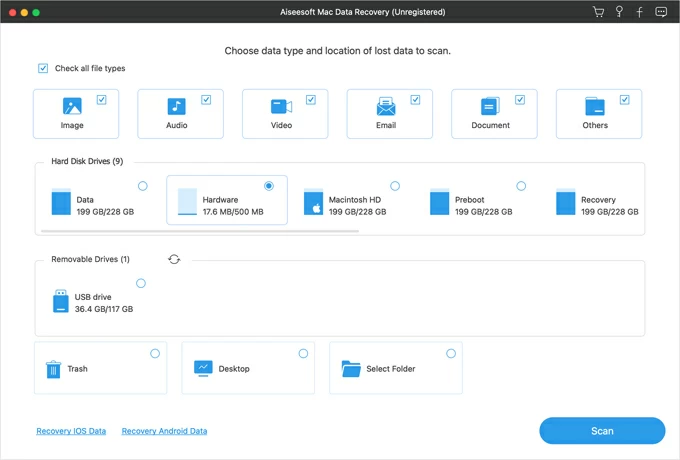
Step 2: Select data type & drive
From the interface, you need to select what types of files you're trying to recover. For example, if you need to recover a deleted photo in Mac hard drive, check the box next to "Image." Check more options if you need more data types.

Next, select where the deleted files are located originally. In this case, we're going to recover emptied Trash, so select "Trash."

Step 3: Scan Trash for deleted files
Click the "Scan" button in the bottom right corner to initial the scan process. During or after the scan, you can look through specific files by type, name, size, and date.
You can also tick the option labeled "Only Show Deleted" at the top center of the screen to show only the deleted files that can be recovered in a list.
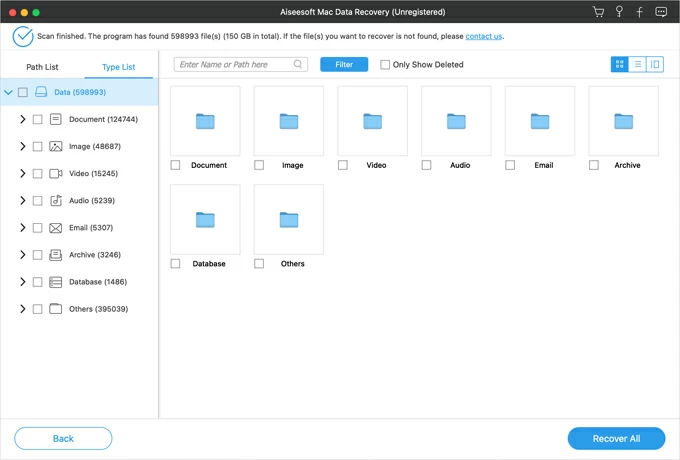
For photos, you may even click a specific one to preview before recovery.

Step 4: Recover deleted files from Trash
After the scan, select the file(s) and press the "Recover" button at the bottom right corner. Specify a location where to store the new recovered files, and you're good to go.
We like the fact that Mac Data Recovery delivers a good user experience of interface, fast scanning speeds, and a good detection rate.
Also: How to recover deleted iMessages on iPhone
In addition to Time Machine, Apple also includes its cloud service to sync and back up your Mac with iCloud. Do you know if you store files in the iCloud on the Apple server? If so, you may be able to recover files after you empty the Trash through iCloud.
To check if you have backed up your files to iCloud, go to:
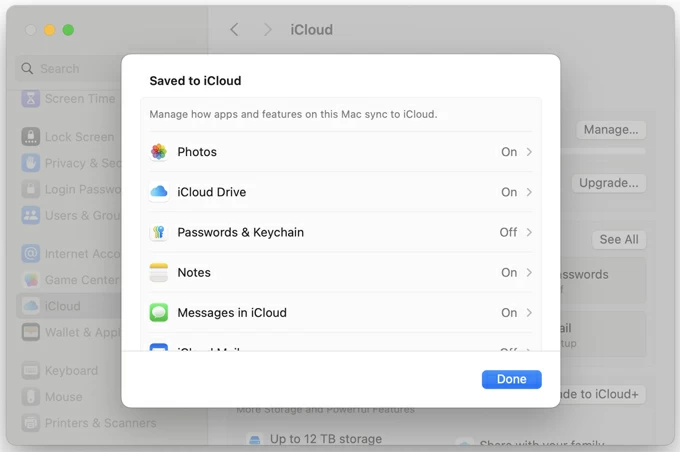
Data to be saved to iCloud:
To restore emptied Trash on a Mac for deleted files with iCloud backup:

Your selected files that you empty from Trash will immediately restore to their original location in your iCloud Drive.
We also have a useful page with directions on how to recover deleted files from SD card on Mac, which you'll want to read before ask someone for help.
Hopefully, one of those methods above give you clues on how to recover files after emptying from Trash in Mac. The best way to ensure you will never have to worry about recovering files when you empty Trash is make a regular backup plan. This will give you some peace of mind when disaster happens. And if you don't have a backup, you really should take action now.
Enable Time Machine to back up Mac: open System Settings > General > Time Machine > Connect an external Hard drive to your computer > Add Backup Disk > select your external HDD as the backup disk > Toggle the "Back Up Automatically" switch on.
Enable iCloud to back up your Mac: open System Settings > Click [Your Name] at the top > iCloud > Sign in with Apple ID > Under Saved to iCloud, click to choose which apps you want to sync and store data with iCloud.
Enable iCloud Drive to back up Mac: open System Settings > iCloud > Under Saved to iCloud, select Drive > Turn on "Sync this Mac" > enable "Desktop & Documents Folders."
We all know most files and folders you deleted from Mac are moved to the Trash Bin before they are permanently deleted after you empty it manually or it cleans the Trash automatically after they have been there for 30 days.
To minimize the possibility of accidental Trash empty, you may disable the automatic deletion feature in your Mac. Simply open Finder, click Preferences, then select Advanced, and untick the box next to "Remove items from the Trash after 30 days."
Also: iPhone Says Security Lockout