
How to Add Music to iPhone without iTunes

Having many pictures saved on your PC and wondering how to sync them to your iPhone? Explore these 6 great ways to transfer photos from Windows to iPhone quickly!

Taking photos is an irreplaceable way to seize the best moments of our lives. If you've got plenty of pictures full of old memories and have them edited and saved on your PC, it's a good idea to transfer photos from your PC to iPhone so you can view the lovely pictures at any time anywhere.
However, transferring photos across Windows and iOS may be a headache for some users. It might not be possible to make photo transfer from PC to iPhone over AirDrop or Bluetooth like you usually do. Even when your device is connected to computer, extra tools are often necessary to move pictures to your iPhone. Therefore, this guide will present 6 highly effective approaches for how to transfer photos from PC to iPhone directly, either using a USB cable or via the Internet.

Six excellent solutions for users to transfer photos across PC and iPhone.
It used to be such a great pain to transfer photos from PC to iPhone, but it's now much easier than ever to import all your old photos and newly edited pics from your computer to iPhone with iTunes.
While using a USB cable, iPhone Data Transfer makes it quick and easy to transfer photos from computer to your iPhone, which can also help to move your music, videos, and other documents.
If you're looking for other options to transfer photos from PC to iPhone without iTunes wirelessly, the following methods will be exactly what you want:
If you want to transfer photos from your PC to your iPhone, one of the best reliable tools is iTunes. It's a great app for music lovers, and it's especially useful for people who would like to move their photos or picture folders from a computer to their iPhone.
Compatible with Windows 10 and Windows 11, iTunes makes it easy to transfer photos to your iPhone from a laptop or desktop computer. However, notice that the process will overwrite the existing Photo Library on your iPhone while syncing pictures from your PC.
Quick steps on how to transfer photos from PC to iPhone using iTunes:
1. Run iTunes on your PC, and connect your iPhone with a USB cable.
If your iPhone has never been connected to this computer before, you may need to tap 'Trust' when the alert box jumps out on your device screen.
2. Click the phone icon at the top left of iTunes window.
If you don't see a phone icon there, disable iCloud Photos feature on iPhone and connect it again.
![]()
Get iPhone connected before photo transfer on PC from iTunes.
3. Choose 'Photos' from the sidebar.
Check 'Sync Photos' box, and select either photos or picture folders that you want to transfer to your iPhone from the 'Copy photos from' drop-down menu.
4. Click' Apply' at the bottom right corner to begin.
It will start transferring photos from PC to your iPhone immediately. Once done, the transferred photos will show up in Photo Library on your iPhone, sorted by date.
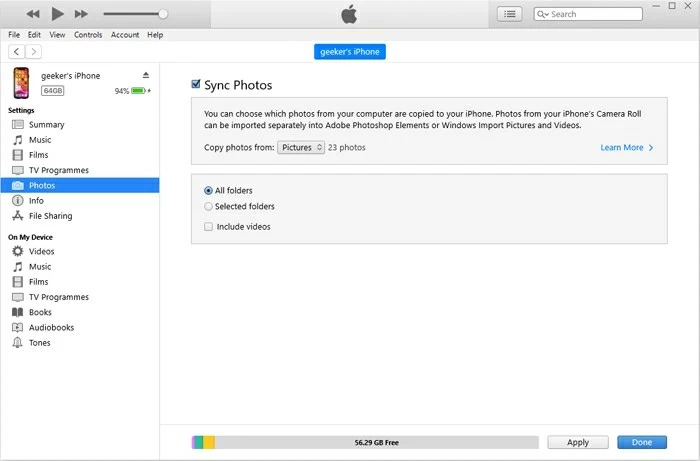
Choose which pictures to transfer from PC to iPhone in 'Sync Photos' section.
Note: The current photos on iPhone will be replaced by iTunes. If you want to keep the existing Photo Library, pick another option below to transfer photos from PC to iPhone without iTunes.
For those who want to transfer photos from PC to iPhone without iTunes, iPhone Data Transfer will be sufficient. With a simple interface, it offers abundant features that can let you directly drag and drop your photos from PC to iPhone, iPhone to PC and even iPhone to iPhone.
iPhone Data Transfer is super quick and safe, and it's also suited for other cross-platform file transfer. You can apply it on your Mac or Windows PC and transfer photos to your iPhone or iPad, and vice versa. All photos, videos, and music files are supported. It also automatically makes your pictures and videos iOS-compatible for easy viewing and playback.
It's widely compatible with all iOS devices and the latest iOS version. Here's how to transfer photos from PC to iPhone without iTunes, including all JPG, HEIC, PNG and more:
Step 1: Open iPhone Data Transfer on your PC and get iPhone connected
Launch iPhone Data Transfer on your computer, and link your iPhone to it using a USB cable. If there pops up a warning box on your iPhone screen, tap 'Trust' to get your iPhone fully connected.

Connect the iOS device before photo transfer from PC.
Step 2: Click 'Photos' from the sidebar
All the photos in your iPhone Photo Library will display here in order.

It also lets you manage iPhone photos or transfer them to your Windows PC.
Step 3: Select the photos on PC and transfer to iPhone
Hit '+' icon at the top, and select any pictures you want by either 'Add File' or 'Add Folder.' To transfer multiple images at a time, press the 'Ctrl' key while choosing each pic or folder on your PC.

After that, the software will automatically transfer photos and videos from your PC to iPhone in seconds. All added pictures will appear in chronological order when you access Photos app on your iPhone. It can also add MP3 to your Apple Music on iPhone from a PC or Mac seamlessly.
Step-by-step video guide to transfer photos from Windows PC to iPhone:
Another option for PC-to-iPhone photo transfer is to use cloud services over the Internet. Since more people now are using cloud storage to backup and store their images, it may be the easiest way to transfer photos to your iPhone from PC.
For iOS users, the Apple-based iCloud is definitely the first and best way to make iPhone photo transfer. With 5 GB of free storage for each Apple ID, it can be a perfect solution to upload and transfer your photos from Windows PC to iPhone. Once you've enabled iCloud Photos (or Sync this iPhone on newer iOS versions) through Settings > Your name > iCloud > Photos, here's how you can transfer photos from a PC to your iPhone wirelessly:
1. Log in to iCloud with your Apple account on PC, which needs to be the same ID on your iPhone.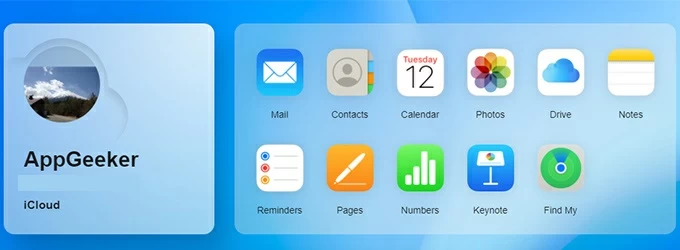
2. In iCloud's main screen, click 'Photos.' You will enter your iCloud Photos and can have an overview of all pictures you've synced with it.
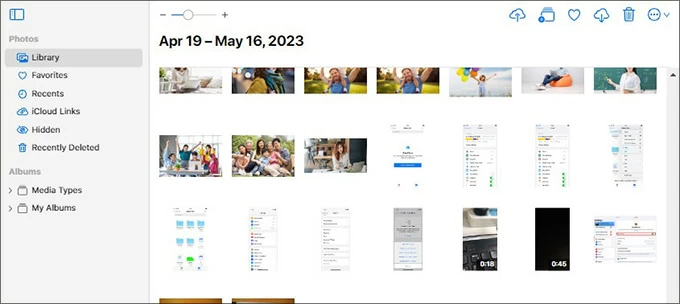
Upload photos from PC to iPhone with iCloud using the same Apple ID.
3. Hit the 'Upload' icon in the upper right corner of the page.
4. Select the photos that you wish to transfer from PC to your iPhone. They will be uploaded and stored in iCloud securely.
You can then access and view these transferred photos on your iPhone or iCloud-enabled device with the same Apple ID.
If your iCloud is short of storage, Google Photos is another cloud-based option for transferring photos on your Windows PC to your iPhone and storing them safely. Every Google user gets 15 GB of cloud storage for free. With more cloud storage than iCloud, you can transfer more pictures to your iPhone at one time. Plus, it lets you access photos on any device signed with your Google account. Here's how to transfer photos from PC to iPhone without iCloud by Google Photos:

You can have an overview of all the photos in your Google Photos account.
The process may take a while, depending on the speed of your network speed and the number of the photos you're transferring. Afterwards, feel free to download the transferred pictures from your Google Photos onto your iPhone.
Using Dropbox to send your photos is like having an invisible bridge between your computer and iPhone, with the ability to add photos, movies, music and documents to your iPhone by simply copying and pasting your files to Dropbox folder on your computer. Follow the steps to transfer pictures from PC to iPhone:

All the photos or picture files that you put in Dropbox folder will be synced to Dropbox cloud.

With so many data and photo transferring tools for iPhone, it might be easy to forgot how convenient the email is. To deliver just a few photos from Windows PC to iPhone without extra installation, using email would be a good option for you.
When your PC and iPhone are both connected to the Internet, simply open a browser on your computer and log into your email account. Then, create a new email attached with the pictures that you want to transfer from your PC to iPhone. You can send the email to yourself. Once done, receive and open it on your iPhone to get all pictures downloaded and saved locally.
With these six ways, anyone can transfer photos from a PC to an iPhone with ease. Pick a suitable method and follow the steps, you'll get a full copy of your desired pictures after PC-to-iPhone transfer and access them in iOS Photo Library.