
Recover contacts on iPhone after deleting an email account
Keep your contacts safe as you breeze take backups of your contacts on the Mac with our top transferring tips.
What to know

You can keep iPhone contacts backed up on your Mac with iCloud, iTunes, a smart tool and Airdrop.
There is nothing worse than finding out your loved one's phone number is missing from your address book when you need them most. We all agree that contacts are one of the most precious data on our smartphones. Therefore, it is crucial to back up your contacts. As an Apple user, you may want to keep your contacts backed up from iPhone to your Mac. (If you are the iPhone user who owns a Windows PC, you may want to transfer contacts from iPhone to computer.)
Keep on reading to learn how to sync contacts from your iPhone to your Mac – we've laid down four effective ways to do that in this post.
Being Apple's official cloud storage service, iCloud allows Apple users to sync their iPhone contacts to their Macs. In addition to that, it continuously updates the contacts on your Mac based on your phone's address book. In other words, any new contacts you create on your phone will be automatically uploaded to your computer.
To get contacts on your Mac, unlock your iPhone and open Settings app. Go to "your name" > iCloud. Toggle "Contacts" to on. A window should pop up to ask you what you would like to do with existing local contacts on your iPhone. Tap on "Merge."

Move to your Mac, in the left-corner of your screen, click on the Apple icon. Then open System Preferences. Click on the "Apple ID" button in the next window. You should see a window like the following screenshot.

By default, when you enter this window, it will present you with iCloud details. If this is not the case, please manually click on "iCloud" in the left menu. Next check the box in front of "Contact."
When you complete these steps, all the contacts from your iPhone will be automatically synced to your Mac.
"I'm always using iCloud to sync iPhone contacts to my Mac, but lately, I have had problems with the iCloud syncing. iCloud won't sync iPhone contacts to my device. Does anyone know how to resolve this problem?"
We have to admit that iCloud is a convenient method when it comes to syncing iPhone contacts to Mac. The premise is that you make sure that everything is foolproof. Otherwise, you'll soon find that iCloud won't sync iPhone contacts to your Mac, there can be the following reasons:
Reason 1: You've run out of iCloud storage. iCloud only offers 5GB of free storage by default. Your iCloud storage may be already full, causing your iPhone contacts to not sync to your Mac. If that's the case, consider paying for upgrades to get more storage.
Reason 2: Your iPhone and Mac devices are logged into different Apple IDs. If that's the case, recheck the Apple IDs used across both devices and sign in across the devices using the same iCloud account.
Reason 3: The contact syncing is turned off on your iPhone and Mac. Make sure to use the steps above to turn it on.
Also read: iTunes won't sync music to iPhone (or iPad, iPod Touch)
This is a full-content transfer, not just the contacts. Unlike iCloud, iTunes or Finder doesn't update your contacts every second, which means you have to manually sync your contacts every time you update or add something.
Before moving to the detailed steps, turn off iCloud contact syncing on your iPhone.
Solution 1: Using iTunes to sync Contacts
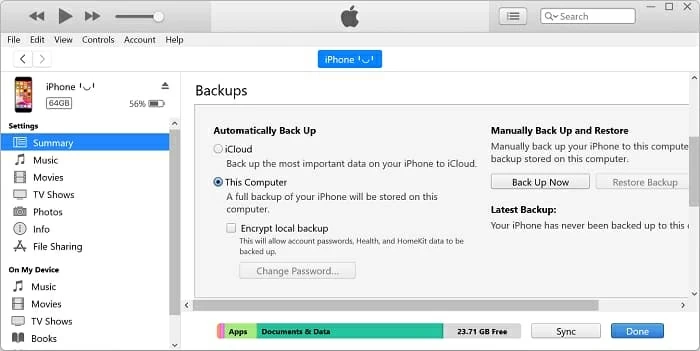
Solution 2: Using Finder to sync contacts
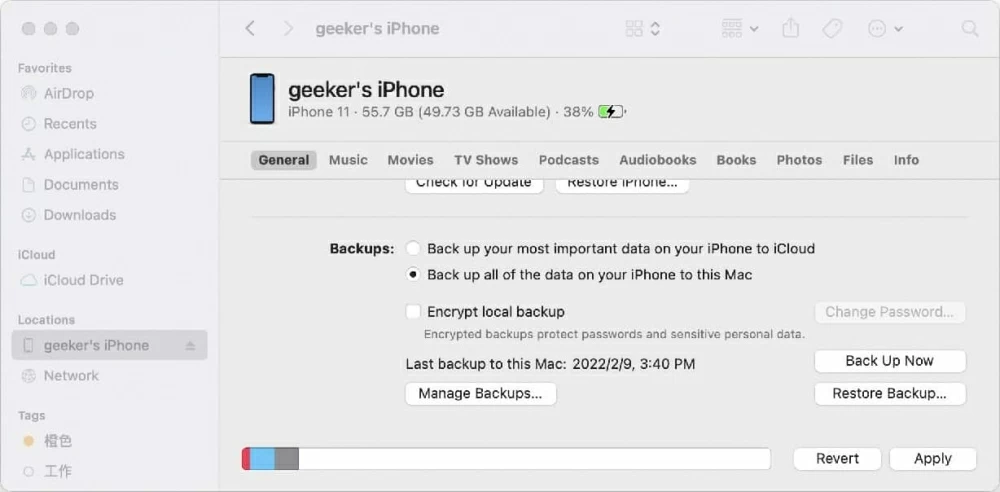
How long iTunes or Finder takes to back up your iPhone data to your Mac depends on the amount of data from your iPhone to be backed up.
You may easily find that the above methods are effective but can be time-consuming and somewhat non-user friendly. The good news is that you don't have to trap yourself in such a rut anymore. A data management tool named Appgeeker iPhone Data Transfer may be a better approach to import contacts from iPhone to Mac.
iPhone Data Transfer is a powerful tool that allows users to easily and quickly share contacts and other data between Apple devices. There is no limit to the amount of data. You can transfer as much contacts as you want. Plus, you can choose which specific contact you want to transfer.
Feel free to click on the button below to download iPhone Data Transfer.
Step 1: Plug your iPhone into Mac
Let iPhone Data Transfer run on your Mac. Connect your phone to Mac via a USB cable to let iPhone Data Transfer detect your device. Once detected, you should see the info of your device on the screen.

Step 2: Click on "Contacts"
On the left side of the software, there are many tabs from which you can hit on the "Contacts" button. iPhone Data Transfer should ask you to select a mode to load contacts.
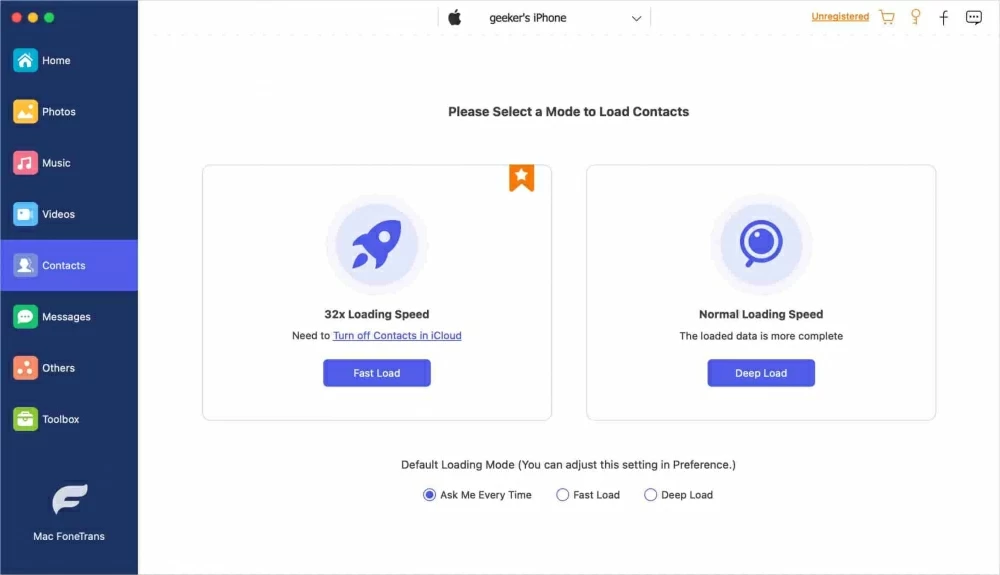
There are two options for you: "Fast Load" and "Deep Load."
Note: If you choose "Fast Load," you need to turn off contacts in iCloud. Click on the "Fast Load" button, a window will pop up to show you how to turn off contacts in iCloud.
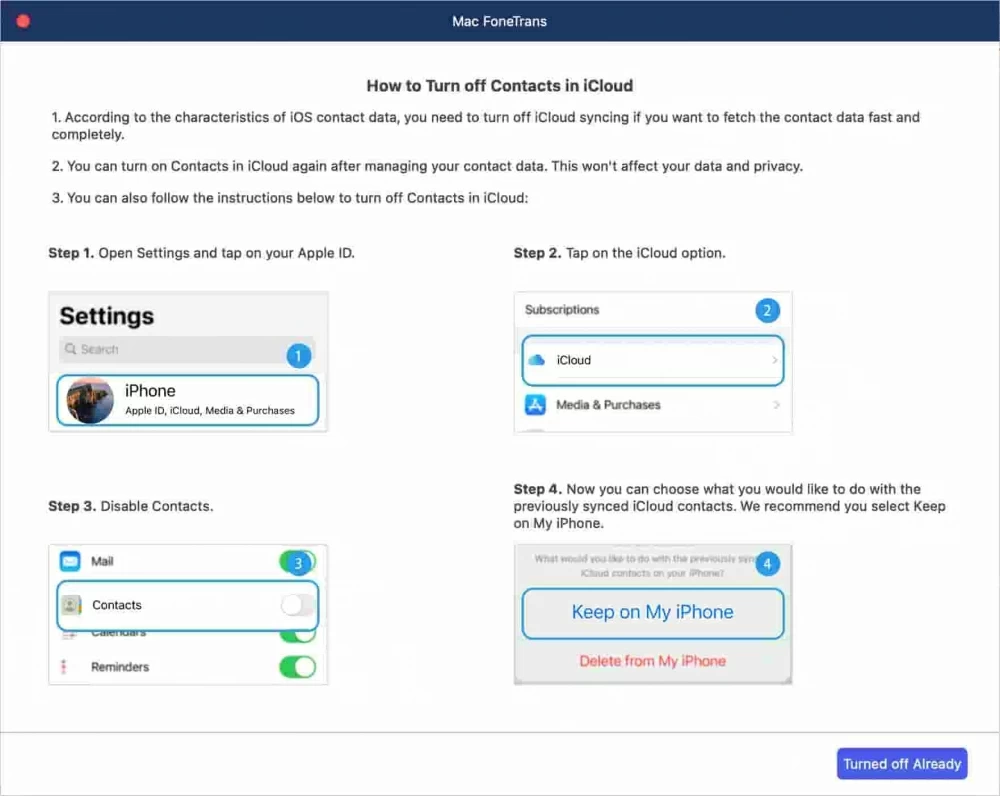
Select "Fast Load" and "Deep Load" as you like.
Once selected, iPhone Data Transfer will back up your iPhone to get your complete data for the first time. Wait a few seconds.
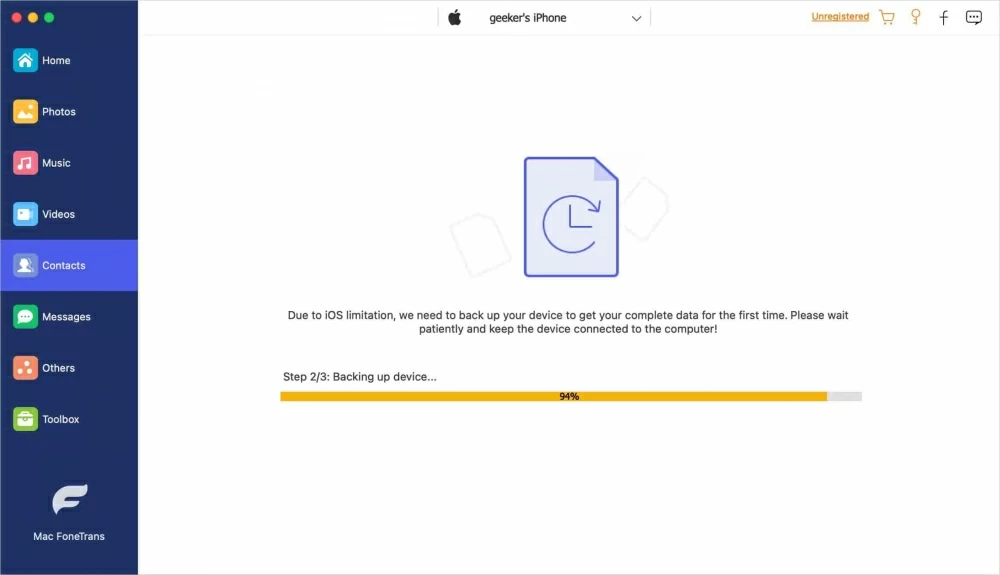
When the backup is complete, all contacts from your phone will be presented in the main screen.
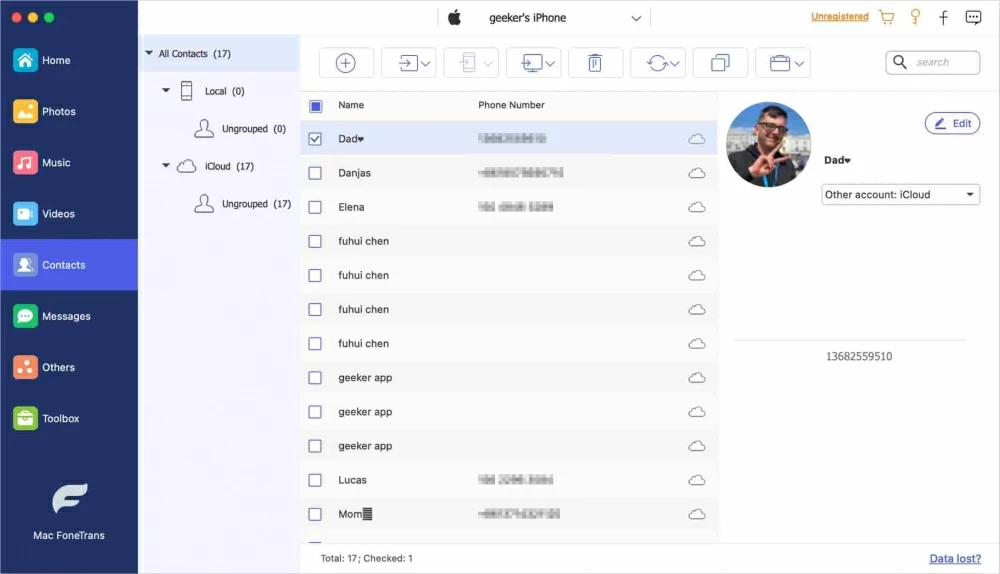
Step 3: Add contacts to Mac
Tick the contacts that you want to transfer. Then click on the computer icon from the toolbar. Select any option you want from the list.
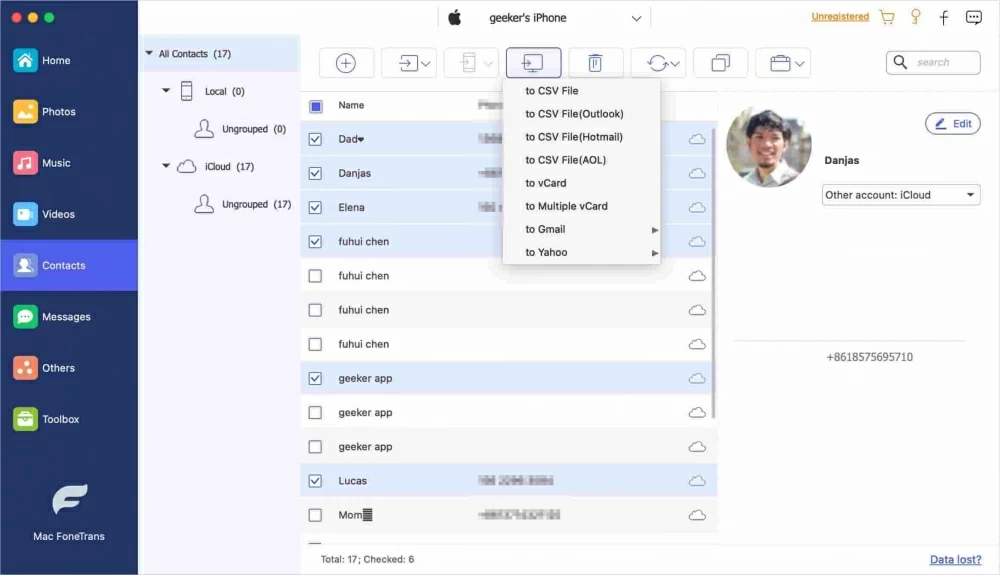
Congratulations, you have the contacts on your Mac now.
iPhone Data Transfer provides users with a one-click step to transfer all your contacts from iPhone to Mac at once. At the bottom of the main screen, hit on "Device to PC."

You should be greeted by a window like the following screenshot.
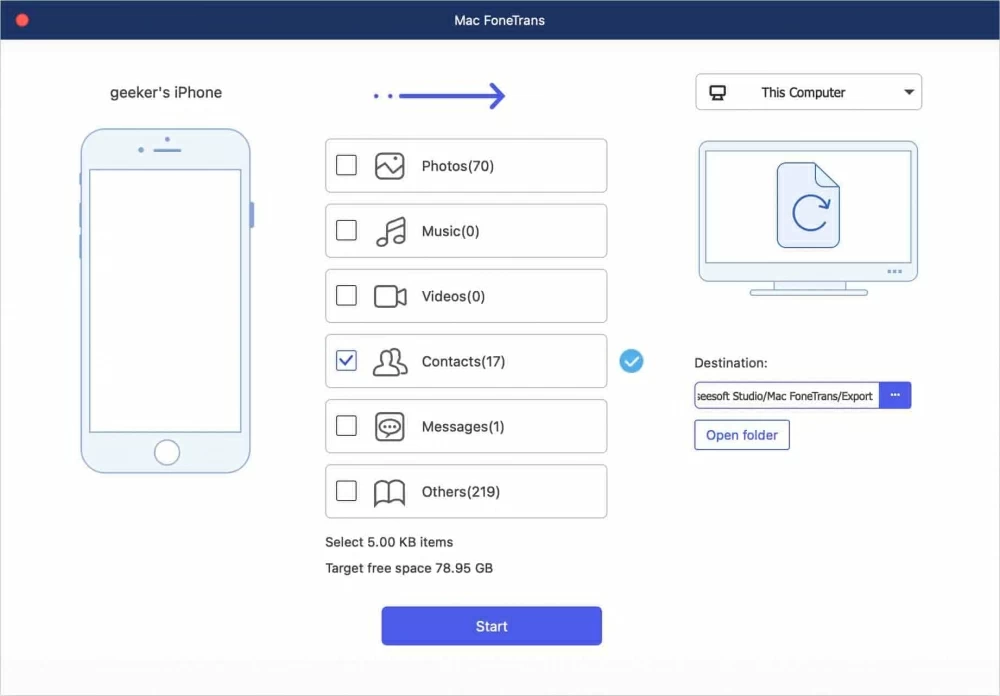
Tick the little box next to "Contacts." After that, click "Start" to let the process begin.
If you only want to import a few contacts from your iPhone to your Mac instead of the entire address book, Airdrop may be the most appropriate way around. Your contacts can be transferred via Bluetooth without using a cable.
Note that Airdrop can only transfer one contact at a time.
Follow these steps:
1. Open the Contacts app on your phone.
2. Select the contact that you want to transfer.
3. Choose "Share Contact" and then tap "Airdrop."
4. From the device list, tap your Mac.
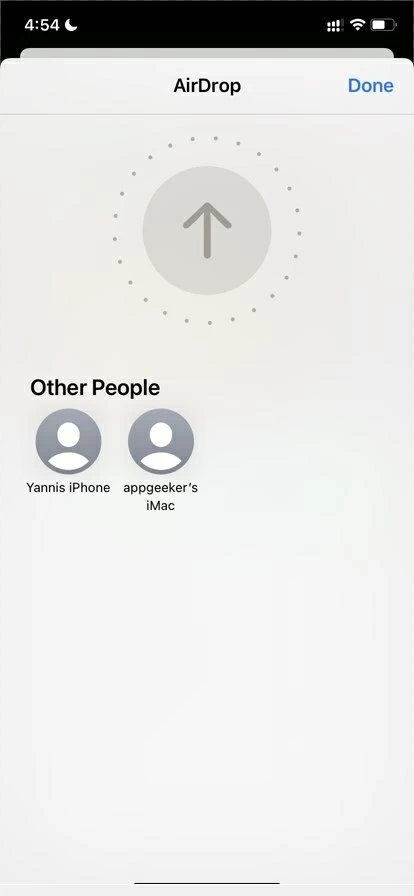
5. Move to your Mac, click "Accept" to proceed with the synchronization of that contact.