
How to Bypass an Unavailable iPhone
Saving a copy of data from your iPhone on a Mac can potentially avoid data loss in case you lose your device or it becomes broken. Here's how to back up iPhone data to Mac.
How do I back up my iPhone to my MacBook? I want to grab the latest version of iOS. I plug the device to the computer but I do not remember how to sync or back it up. I don't want to losing any data.
No matter how responsible you are, there may come a time when you lose information on your iPhone because of loss or damage. This is why it's important to regularly back up iPhone to computer or iCloud. The article focuses on how to backup iPhone on Mac, MacBook, and iMac.

It's easy to backup an iPhone onto Mac to keep your files safe in the event your device is lost or damaged.
Many diligent users are serious when it comes to backing up iPhone to Mac, but which tool should be used is a little confusing, especially for those on macOS Catalina 10.15 or later. Take it easy. You can use Finder to make an iPhone backup to Mac - which works almost the same of using iTunes in macOS earlier than Mojave 10.14, and copy your data and settings to the HDD including photos, videos, text messages, iMessages, WhatsApp, contacts and more.
If you're looking for an easier way to back up iPhone to Mac, and view the copy of information you've kept on the computer, iOS Data Backup & Restore is such a tool you can't miss.
Jump to:
Tip: If you have just lost everything because your iPhone is lost, damaged, stolen, or you've upgraded to a new iPhone, then have a look at this article for some ideas on ways to restore all content and settings from backup. We also have a separate guide to the best iPhone backup extractor.
Since macOS Catalina, you can no longer back up with iTunes. The simplest solution is probably to backup your iPhone to your Mac using Finder—Apple's free backup software. Similar to iTunes, Finder backs up, or copies your files and settings from iPhone and keeps anything safe from the incidents where your handset is ever replaced, lost, damaged, or stolen.
The only concern would be your hard drive space. If the space on Mac is maxed out, Finder will fail to back up your iPhone.
1. Connect your iPhone to your Mac through a USB cable.
2. Open Finder from Dock.

3. Select your iPhone under Locations in the Finder sidebar.
4. Click General at the top of the window. This displays your sections of Software, Backups, and Options.
5. Head to Backups section and check "Back up all of the data on your iPhone to this Mac".
6. In Options section, you can select "Automatically sync when this iPhone is connected" to let your Mac back up data from iPhone automatically.
7. Hit Back Up Now.

Making a backup with Finder should take some time to finish. It depends on how long has it been since you backed up your iPhone on Mac. Once the backup is done, you will see the date and time of the last backup to this Mac.
You've managed to backup iPhone to Mac, but have you ever wondered where are iPhone backups stored on Mac? According to Apple, iPhone backups you made with Finder or iTunes are saved to the Backup folder in the Library. Here's where to find iPhone backup on Mac.
Access Backup folder and find iPhone backup on Mac:
Note: You can copy the Backup folder to another location if you need copies of your backups. Do not try to move, rename or edit, as this will ruin your backups and cause data loss.
Find a specific backup of iPhone in macOS Catalina or newer:

After you backup your iPhone and know where is iPhone backup stored on Mac's drive, you can use the backup to restore the content on your device—whenever you lose your data. If your phone has been factory reset to improve its laggy performance or fix the issue of stuck in a restart loop or whatever, you can then restore the most recent backup to your clean-wiped device.
A Finder backup of iPhone also makes it especially easy to transfer all of your data and settings from one iPhone to a new one.
1. Connect your device where you wish to restore the backup to your machine.
2. In Finder window, choose your iPhone under Locations in the sidebar.
3. Click Restore Backup in the Backups section.
4. From the pop-up menu, choose a backup you want to restore to the iPhone. If your backup is encrypted, type in your password.
5. Click Restore.
On macOS Mojave 10.14 or earlier, use these steps to backup iPhone to iTunes with Mac.
With your iPhone connected to iTunes, choose the Device icon at the top left of the window, click Summary in the left column, and then click Back Up Now. You can also take a full encrypted backup of iPhone to Mac by enabling "Encrypt local backup" and setting a password.
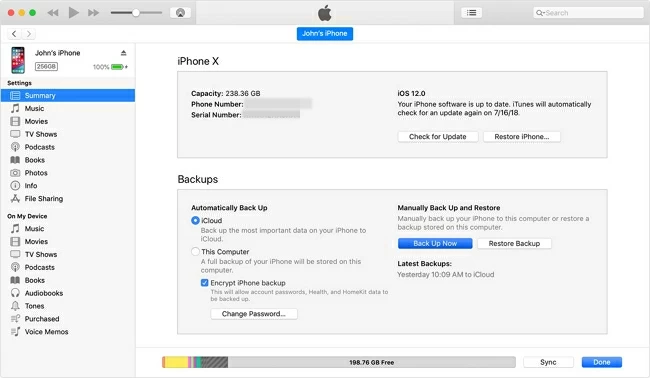
Apple's Finder and iTunes are reliable that you're able to comfortably backup your iPhone to the Mac, and manage the backup without downloading additional software. However, you may find it lack of flexibility when you need to back up the data that has been added since the previous backup - you have to backup the entire information each time.
Well, it's not a bad idea to install and iPhone to Mac backup software tool. A better one-stop option would be iOS Data Backup & Restore.
The flexible utility allows you to back up all sorts of data from iPhone to Mac to save a full copy of information on the computer, or just select certain types of files to backup such as photos, videos, audio files, messages, contacts, call logs, notes, voice mails, etc. Likewise, you can set to make an encrypted local backup of iPhone to Mac to for extra security.
Once your iPhone is backed up, you can view or access the contents of the backup file in a readable format. Whenever your iPhone is broken or missing, you can restore the backup and extract the files without doing a restore which will delete your current phone data.
Step 1: Attach the iPhone to the Mac. Make sure to unlock your iPhone. Learn what to do if you forgot your passcode.
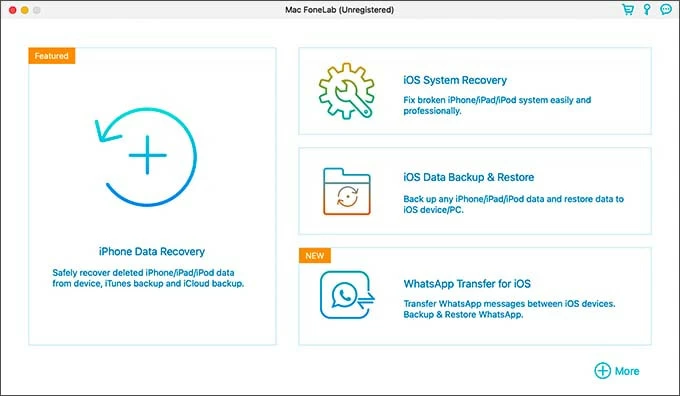
Step 2: Once you get the application set up in Mac, launch it and choose "More tools" at the lower left of the interface.
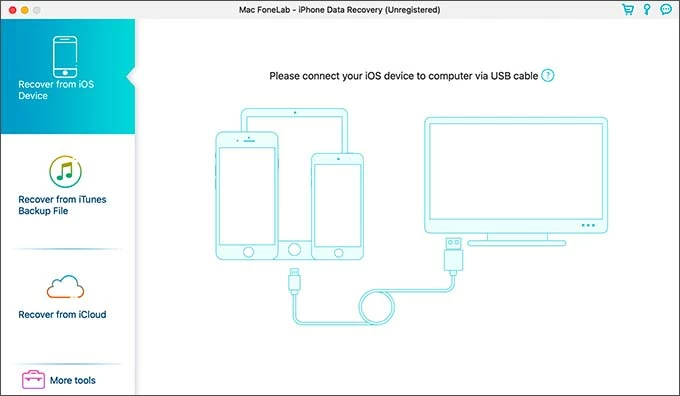
Step 3: Select iOS Data Backup & Restore mode for the backup purpose.
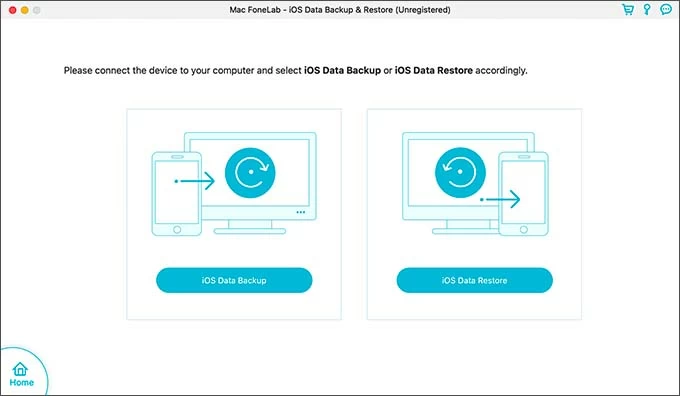
Step 4: Click iOS Data Backup button to move on.
Step 5: Select to back up with Mac in a suitable way: Standard Backup or Encrypted Backup. Click Start button.

Step 6: Check your desired types of files to back up. You can backup all the data from iPhone to Mac.
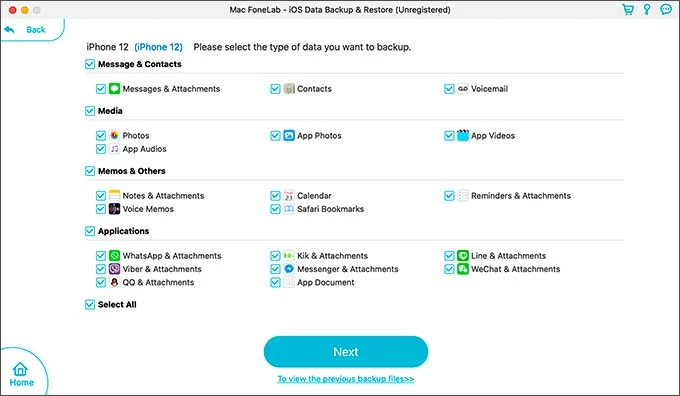
Step 7: Hit Next button to begin creating a backup.
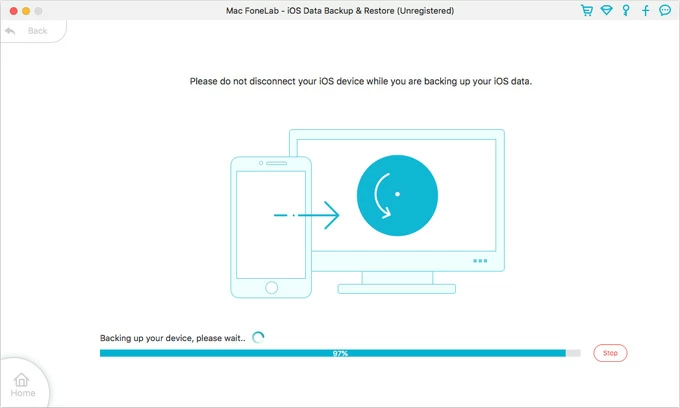
Wait for the process to finish, and you'll get "Congratulations!" window. The content stored in iPhone is now backed up and available on Mac's hard drive.
To salvage your data from loss or damage of your iPhone, you can restore the backup. iOS Data Backup & Restore software helps you access the backup, see what's in it and restore your information without losing anything.
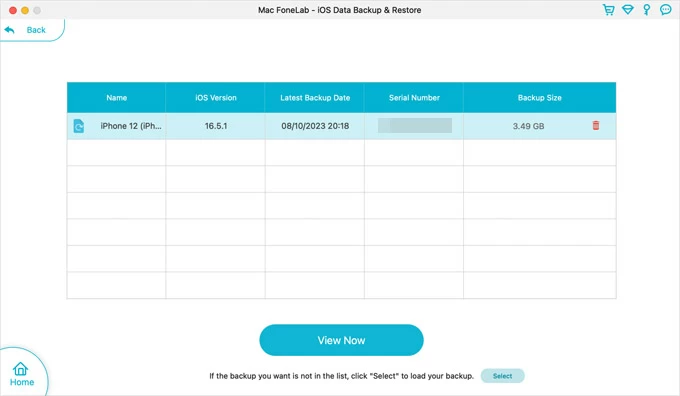
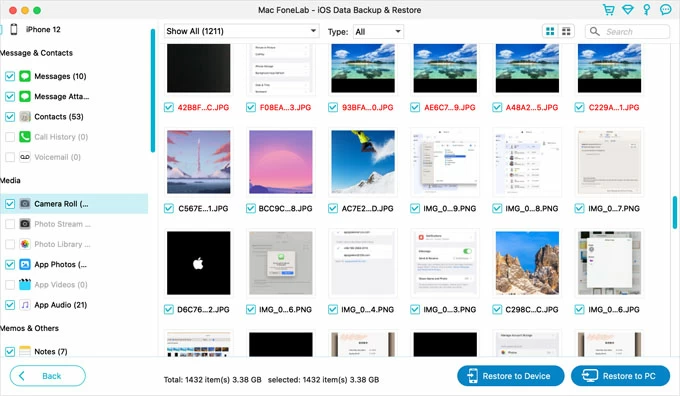
Done! Read Also: How to Recover Deleted Data on iPhone with/ without Backup
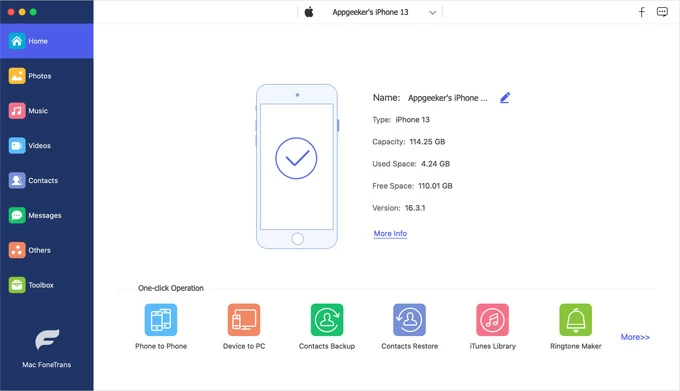
Would like to copy songs, podcast, playlists, audiobooks, pictures, videos, ringtones and more media files from iPhone to a Mac for a backup? This is where iPhone Data Transfer comes in.
It's considered to be an alternative to iTunes or Music app (in macOS Catalina or newer) that can backup an iPhone to a Mac in a direct manner, and can transfer data files from your iPhone to a new iPhone or iPad without doing a backup or restore via iTunes or Finder.
Take transferring music on iPhone to Mac computer for a backup as an example.
The music will save into the path of your choice in the Mac computer. You can also do the opposite journey of copying music files from Mac to the iPhone.
[Don't miss: How to transfer photos between iPhones without iCloud]
If you own a Mac or MacBook running macOS Catalina or higher, you don't have use iTunes to backup your iPhone. Instead, you need to make your local backups with Finder.
1. In Finder window, locate your connected iPhone under Locations on the sidebar.
2. Choose General tab.
3. Click Back Up Now in the Backups section.
You'll need to make some tweaks in Finder so you can backup your iPhone to Mac using Wi-Fi.
1. Attach your iPhone with your computer.
2. Run Finder and select your iPhone under Locations on the left-hand side.
3. Click General tab at the top button menu.
4. Scroll down to Options section and check "Show this iPhone when on Wi-Fi".
5. Click Apply.
As long as your Mac and your iPhone are on the same Wi-Fi network, Finder is supposed to backup iPhone to Mac without cable.