
How to Transfer Photos from iPhone to PC
You may want to take backups of your iPhone, but using iTunes can be hectic at times. Here are 3 more convenient ways to back up your iPhone.
What to know
You may want to take backups of the data on your iPhone without iTunes for partial-backup reasons.
Rather than being our gadget, iPhone is more like our database: we have kept a large amount of data on our iPhones. Therefore, regular backups of your iPhone are vital.
Apple offers an established tool — iTunes that can be used to back up iPhone. After connecting your iPhone to your computer and clicking a few buttons in iTunes, it will start backing up all the data from your iPhone automatically. This is good, but backing up iPhone on iTunes is not a perfect choice: you can't select what to back up because it performs a full backup. That's why we're here to help you pick exactly the right method to back up your iPhone without iTunes.
Apart from iTunes, iCloud is also another method approved by Apple to back up iPhone without iTunes. It allows you to back up your iPhone over Wi-Fi and without a computer. However, every picture has two sides. iCloud has a limited amount of free storage (5 GB) available for backups which could be expanded by paying money though. Moreover, you will need to restore an iPhone, iPod, or iPad with the same Apple ID to access the backup data.
Here's how to back up your iPhone without iTunes via iCloud:
Simply connect your iPhone to Wi-Fi and open Settings app. Tap your name, and then select "iCloud" from the list, followed by "iCloud Backup."
Toggle the "iCloud Backup" option on to activate it.
Tap "Back Up Now" to let iCloud begin backing up your iPhone to the cloud without iTunes.
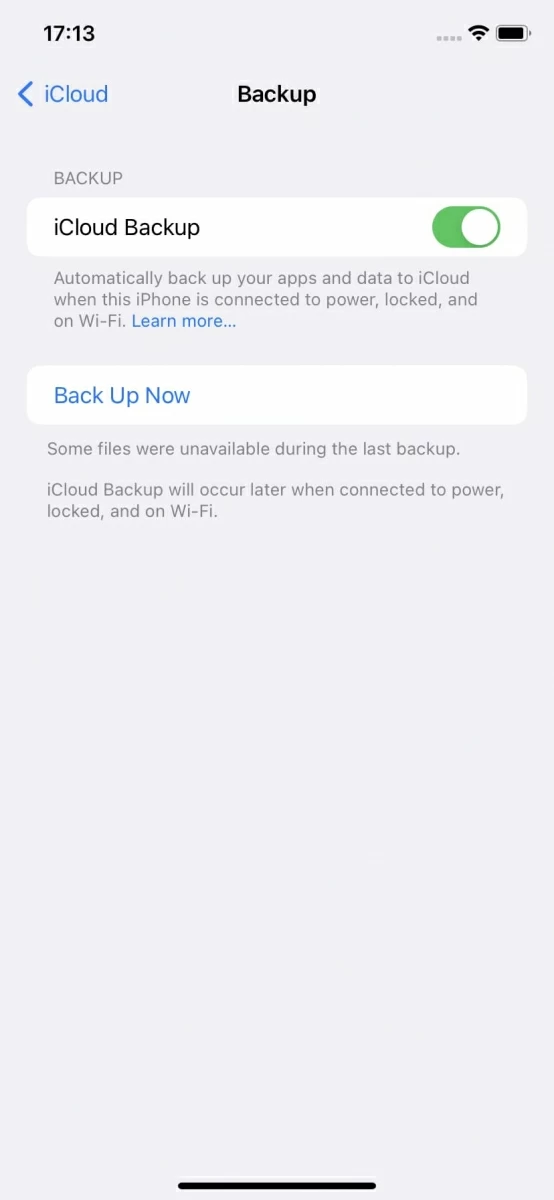
Again, iCloud only offers 5 GB of free storage for each account. In case you have more than 5 GB of data to back up, you can upgrade to get more storage on a paying basis or keep reading on to pick other methods.
Tip: If you are switching to a new iPhone and want to view the content in the backup, tap Restore from iCloud Backup when you reach the Apps & Data screen.
Every once in a while, you may find iCloud backup even doesn't work. No worries, there are also 3 alternatives of iCloud to transfer data from iPhone to iPhone.
As mentioned above, every Apple account only gets 5 GB of free iCloud storage. In case you have more than 5GB of data on your iPhone, you may be seeking a method to back up your iPhone without iTunes and iCloud.
As an all-in-one application, iPhone Data Transfer is perhaps the best choice for you. No matter how much data you're going to back up, it can still help you perform this feat efficiently.
Unlike iTunes, you can select multiple file types to back up, including music, photos, videos, contacts, messages, etc. Simply click on the green button above to download this useful tool and keep your iPhone backed up on the computer.
Use a USB cable to plug your iPhone into your computer and run iPhone Data Transfer. Tap "Trust" on the iPhone to make sure the connection between your iPhone and the computer. Once connected, the tool will detect your iPhone and show you the details of your device.
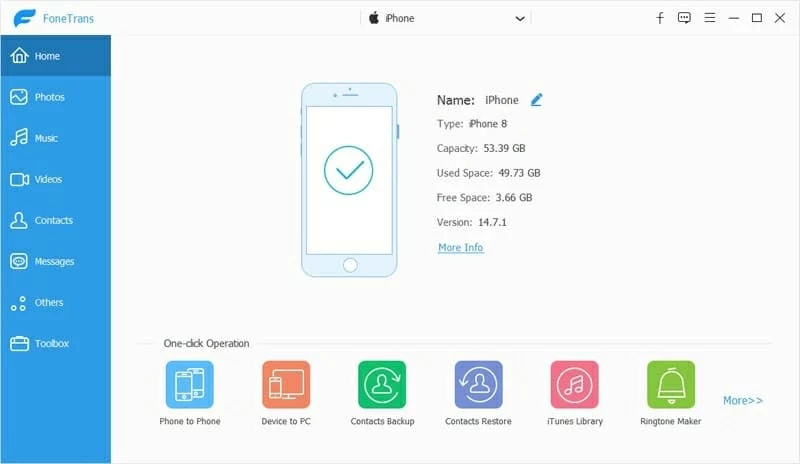
You can see some tabs on the left sidebar of the tool, including Music, Videos, Contacts, Messages, etc. Feel free to pick the data that you want to back up. Here we take music files as an example. Click on the Music button, the tool should load up all the music files from your iPhone like the screenshot below.

No matter which tab you click, iPhone Data Transfer will list the relevant files on your iPhone.
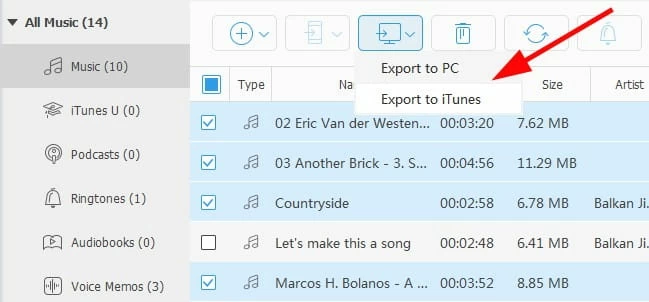
From the music list, choose the music files that you want to back up on your computer. After that, click "Export to PC" to start the process of backing up your iPhone without iTunes.
A shortcut to back up your iPhone without iTunes
With many powerful features, iPhone Data Transfer also offers a one-click-to-goal option to back up your iPhone on a computer without iTunes.
After connecting your iPhone to your computer, find the One-click Operation section at the bottom of the interface. From this section, choose "Device to PC."

A new window with all the data being selected by default pops up. Also, you can deselect the data that you don't need to back up.
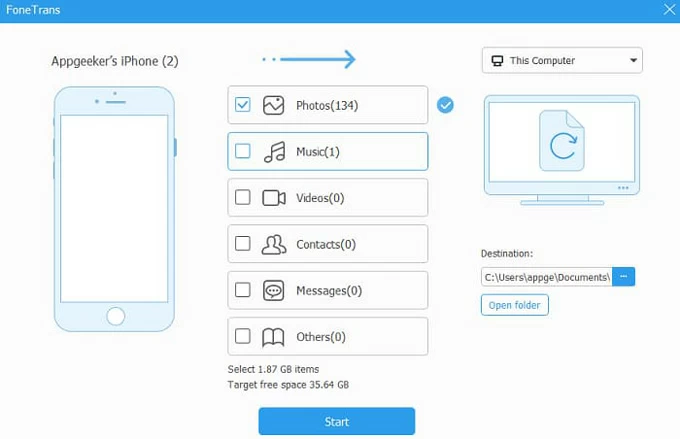
To select a location folder for backups, click on the three dots in the "Destination" box, followed by the "Start" button.
When it comes to managing data between your computer and iOS devices, iTunes has always been the go-to tool. But iTunes has endured too much alone, as a simple piece of software, it gradually became large, bloated and buggy.
iTunes finally has been retired. In macOS Catalina, Apple has jettisoned iTunes in favor of Finder — a smaller dedicated application for backing up your data.
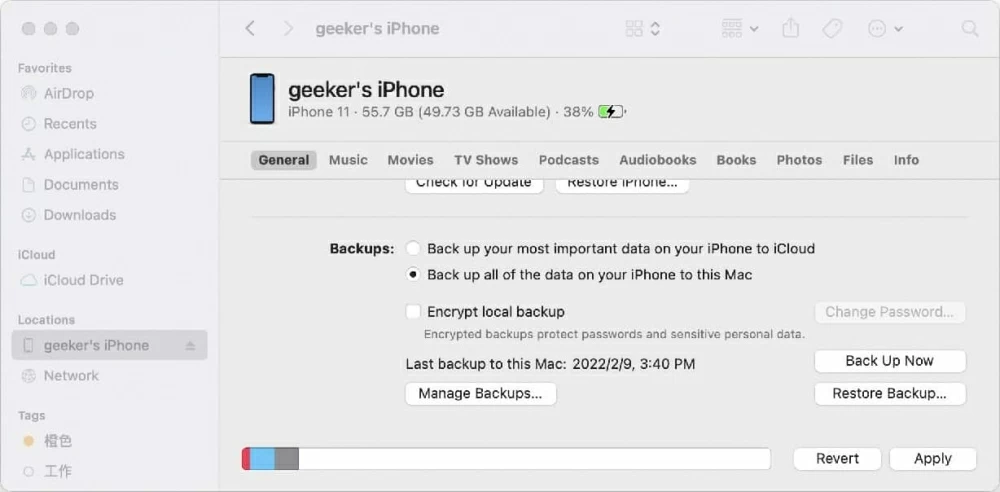
If you are using a Mac of a version that is later than macOS Catalina, follow these steps to back up your iPhone on Finder without iTunes:
Connect your iPhone to your Mac and launch Finder. Unlock your iPhone and trust the Mac. Click on the "Trust" button on your Mac if asked. Click on your iPhone's name in the Locations section. From the horizontal tabs, choose the "General" tab. Scroll down to find the "Backups" section, hit "Back Up Now" to start the process.
To conclude, backing up your iPhone without iTunes isn't as hard as you might think. There are basically 3 ways to do that in this post. iCloud is a wireless method approved by Apple, enough storage is required, though. Unlike iCloud, iPhone Data Transfer does not limit the number of backup data, which makes it gain enough popularity among users. Besides that, in case you own a Mac running macOS 10.15 and the later, you can back up your iPhone on Finder. Simply pick one method and enjoy the process of backing up.